AWS Elastic Beanstalk
Amazon Web Services (AWS) Elastic Beanstalk is an easy-to-use service for deploying and scaling web applications and services developed with Java, .NET, PHP, Node.js, Python, Ruby, Go, and Docker on familiar servers such as Apache, Nginx, Passenger, and IIS. It’s the fastest and simplest way to deploy your application on AWS. It automatically handles the deployment details of capacity provisioning, load balancing, auto-scaling, and application health monitoring. Within minutes, our application will be ready to use without any infrastructure or resource configuration work on your part.
There is no additional charge for Elastic Beanstalk – it’s to be paid only for the AWS resources needed to store and run our applications.
To use Elastic Beanstalk, we need to create an application, upload an application version in the form of an application source bundle to Elastic Beanstalk, and then provide some information about the application. Elastic Beanstalk will automatically launch the environment and creates, configures the AWS resources which are needed to run the code. After creating the application, provide the information about the application—including metrics, events, and environment status which you can get through the AWS Management Console, APIs, or Command Line Interfaces, including the unified AWS CLI.
Steps to deploy Node.js application in AWS beanstalk
Before deploying AWS, make sure you the following things are ready in plate :
Step1: Install AWS CLI & Elastic BeanStalk CLI in your system. you can follow the below guide to install both in your system.
To Install AWS CLI – Go to this page
To Install Elastic BeanStalk CLI – Go to this page
Step 2: Here I am taking the Node JS sample application to use for our Deployment. If you are using Node ‘express’ framework, you can use the following reference here to create an application instantly.
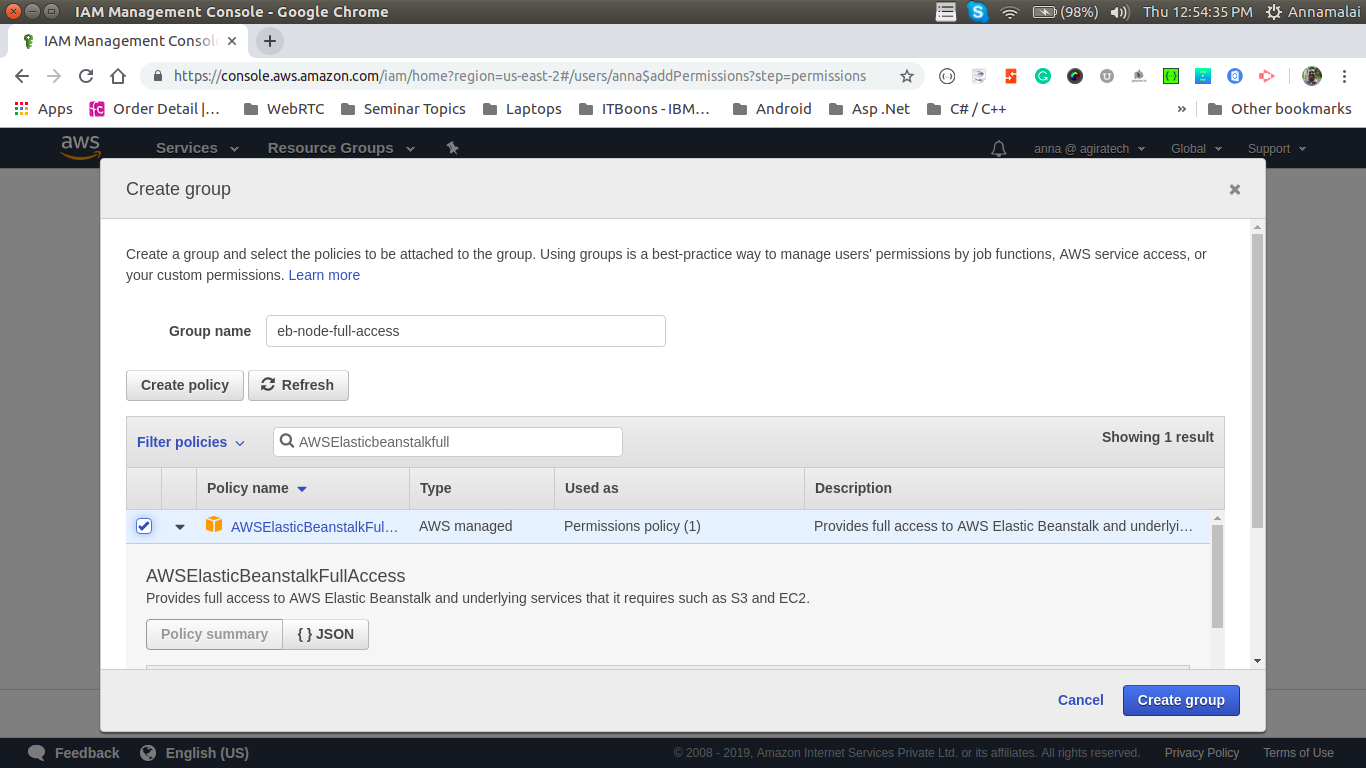
Step3: Create IAM User within AWS to handle deployments. Follow this guide to create the IAM user
Steps to Set up IAM User
- AWS Access type as ‘Programmatic Access’
- Group assigned with ‘AWSElasticBeanstalkFullAccess’ Policy
- AWS Access Key ID & AWS Secret Access Key
Step 4: Elastic beanstalk ready AWS environment
Once these are ready, the next step is to set up Auth for AWS access.
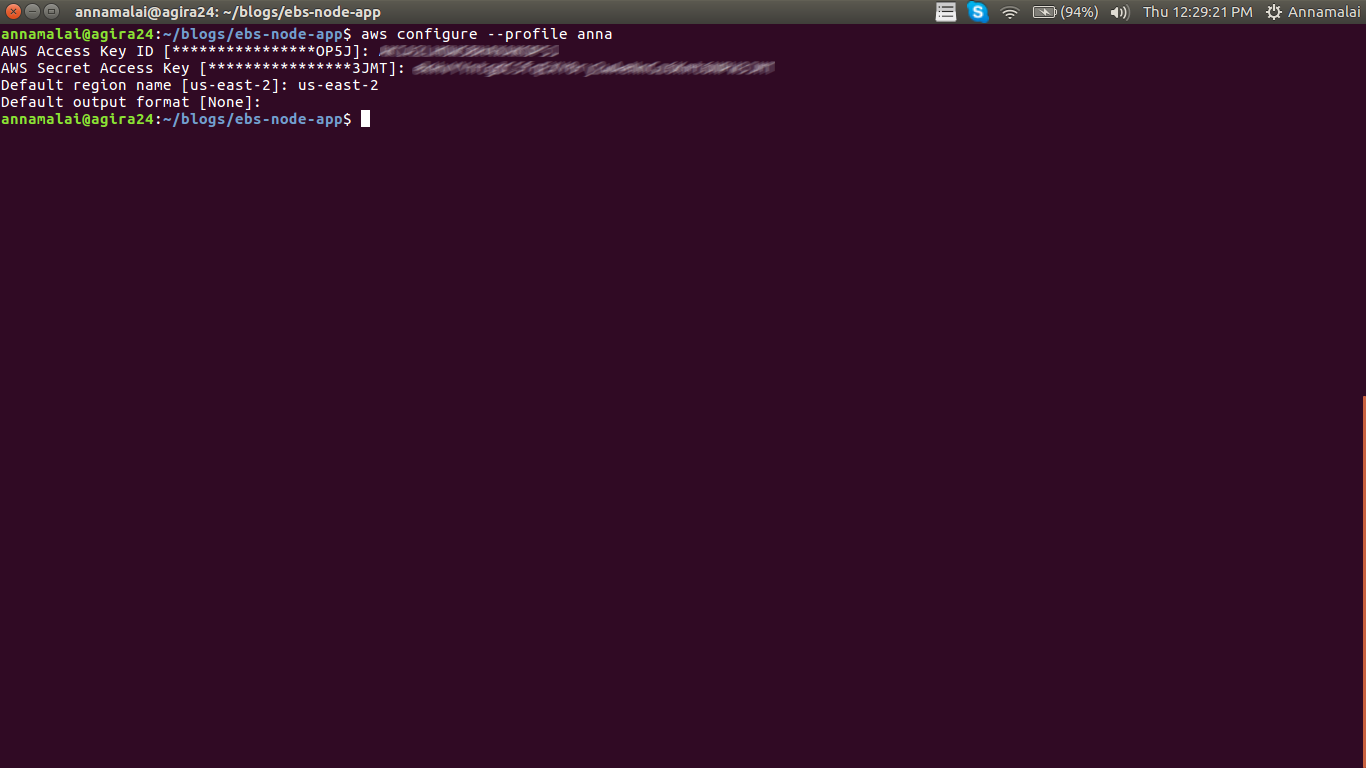
Auth Setup
Auth Setup can be done by configuring AWS with the IAM user profile. Here my AWS profile name is ‘anna’. So, I configured the AWS Profile as below :
Creating Elastic BeanStalk Application
Elastic Beanstalk CLI tool is used to initialize our Node project as an EB project. For this purpose, we are using the ‘eb init’ command along with the IAM to create the user profile.
As we have an IAM Profile created as ‘anna’, I am using the same profile to initialize an EB CLI Project, instead of plain ‘eb init’.
- Select a default region
- Provide credentials (AWS access ID & AWS Secret Key)
- Select an application to use (as we are running the commands in current nodejs project, it will be selected)
- Select a Platform, that matches the language or framework, here ‘Node.js is our Platform
- Then setup SSH Instances for EB environment.
- Next, the EB CLI registers the new key pair with Amazon EC2 for you and stores the private key locally in a folder named .ssh in your user directory.
Click this link to know the full list for configurations available with the EB.
Setting Up Beanstalk Environment
Creating environments with EB CLI requires a service role. The service role can be created by creating an environment in the Elastic Beanstalk console. If we don’t have a service role, the Elastic Beanstalk CLI attempts to create one while running ‘eb create’.
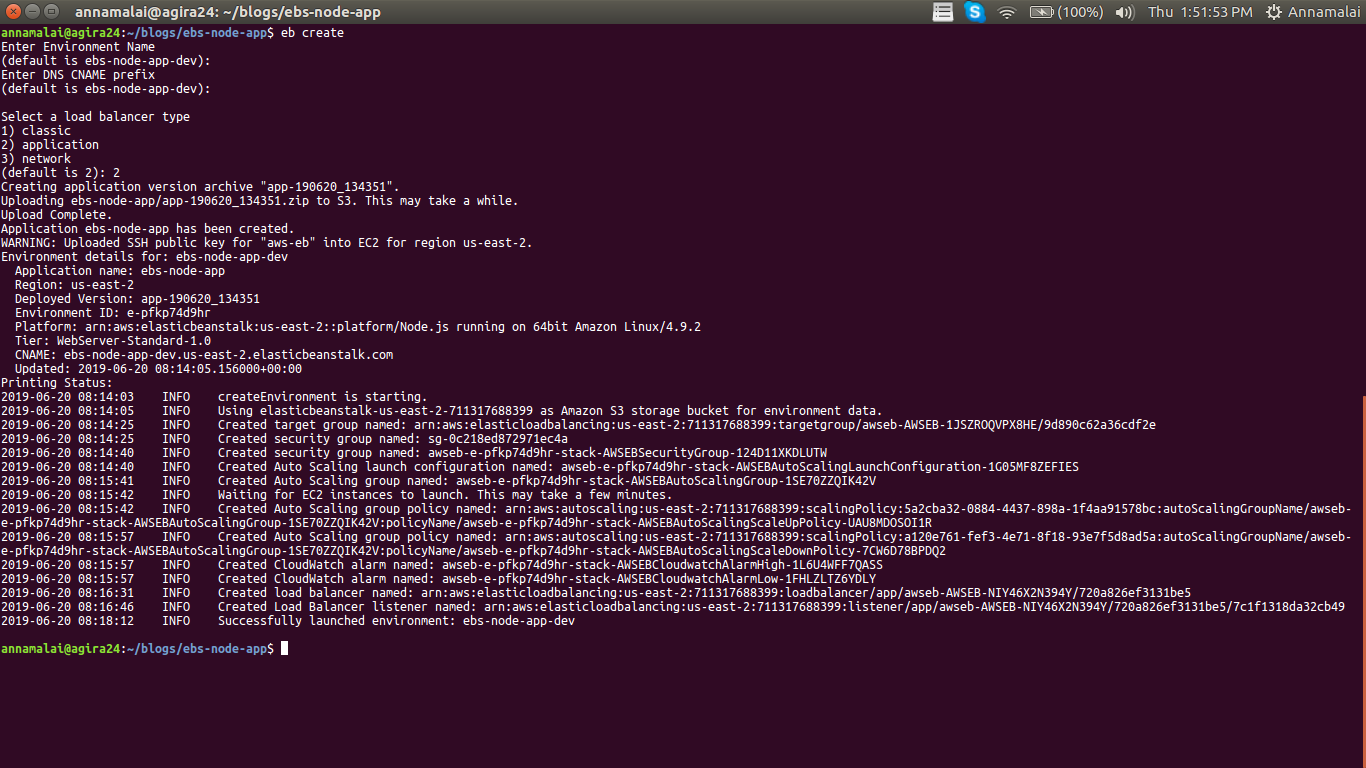
After executing the ‘eb create’ command in our Node application directory, you can able to see ‘.elasticbeanstalk’ the directory inside of our application which has a ‘config.yml’ as mentioned below :
branch-defaults:
default:
environment: ebs-node-app-dev
group_suffix: null
global:
application_name: ebs-node-app
branch: null
default_ec2_keyname: aws-eb
default_platform: Node.js
default_region: us-east-2
include_git_submodules: true
instance_profile: null
platform_name: null
platform_version: null
profile: anna
repository: null
sc: null
workspace_type: Application
This file contains enough information needed for EB to create the environment.
This link will provide detailed information on creating the EB environment through CLI.
The next step is to configure the EB to deploy our uploaded Node application on the beanstalk environment.
Also Read
Deploying Node.Js application
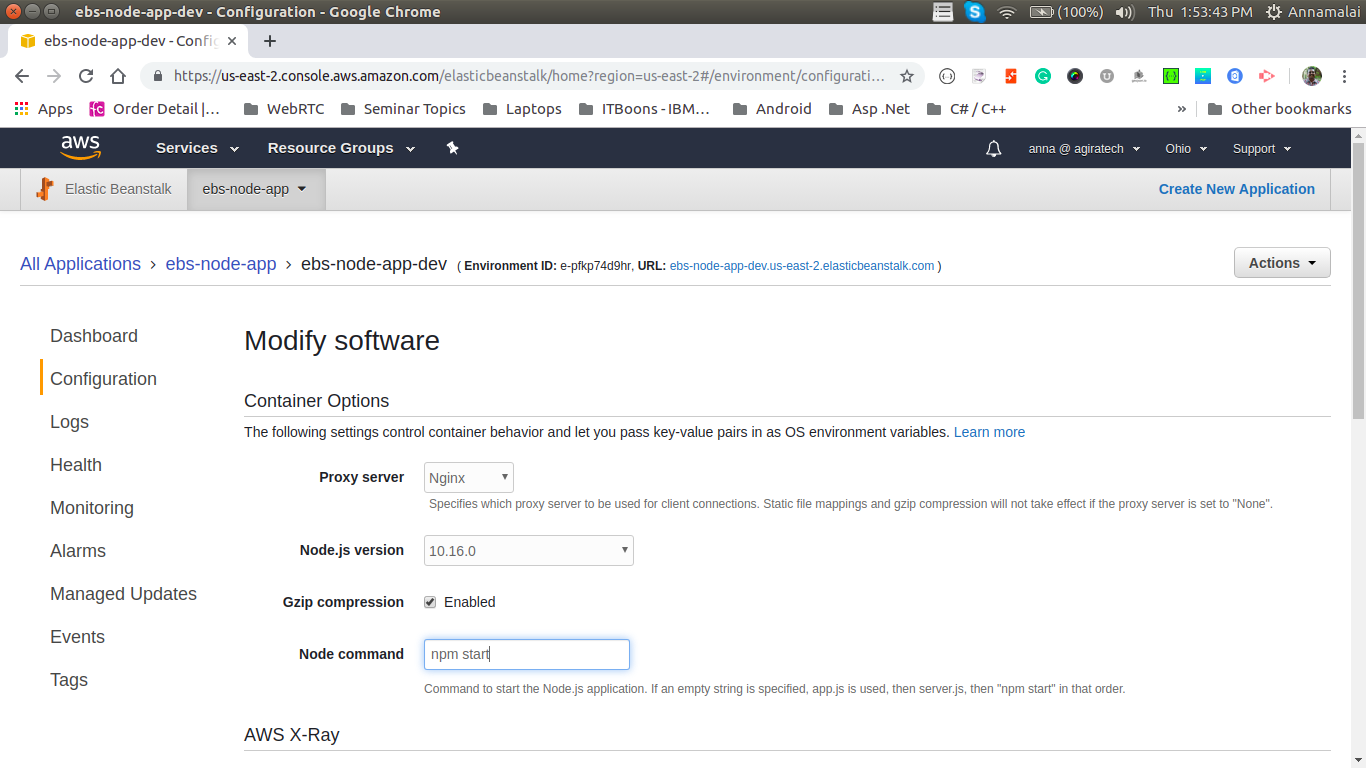
Before deploying your application on the beanstalk, the Node Command has to be configured with ‘npm start’ to deploy the application. Now, the beanstalk will start deploying your application and its health status now will become ‘OK’. So, it’s a sign that our application is in a good state.
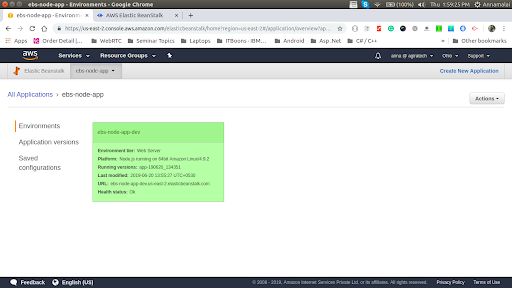
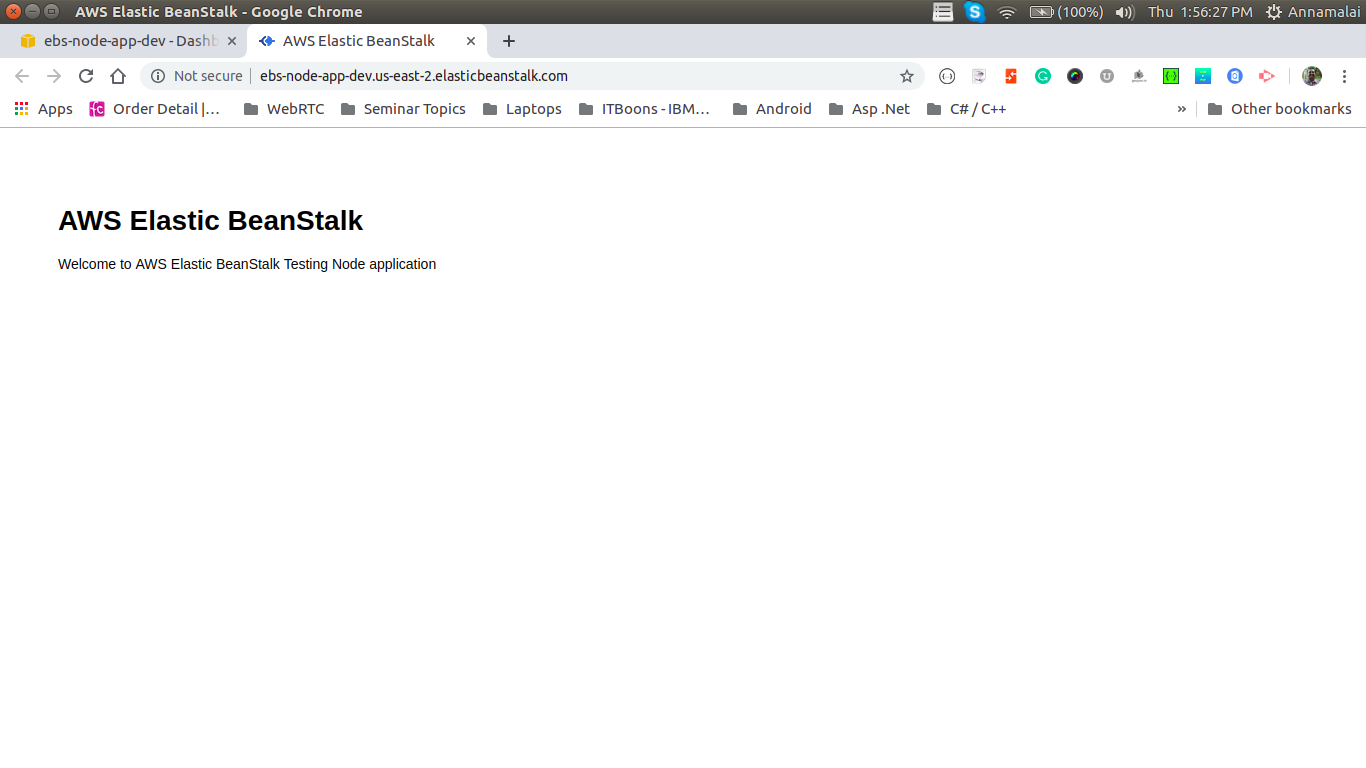
Once it is done, we can able to watch our application live, using the beanstalk URL which will look like this, ie., http://ebs-node-app-dev.us-east-2.elasticbeanstalk.com/
This URL will hold the application name & server URL of the beanstalk.
In case, If you wish to make any changes on the Node application, and wish to deploy your application after that, then we can use the ‘eb deploy’ command from the console.
Thanks for reading! I hope you have got a clear view of deploying Node.js application in AWS Elastic Beanstalk. Do post us your queries in the comment section. We love to help you out.
Related to NodeJS