Before entering how to develop a web application using Django let’s know what is Django, how to install and then move to develop an application.
What is Django?
Django is an open-source web framework that follows the principles of “Don’t Repeat Yourself”. It is all about writing simple code and non-repeating. It is also a high level and MVT(Model View Template).
Steps to install Django
- pip install Django==3.0.4
- python3 -m django –version
Creating a new project in Django
If this is the first Django application then, you will need to have the knowledge and should take care of the initial setup. There are few auto-generated codes that establish a Django project. This initial setup consists of a collection of settings for an instance of Django, which also includes database configuration, Django-specific options, and application-specific settings.
ALSO READ: How To Develop A Healthcare Mobile Application For Hospitals
Command – 1:
django-admin startproject projectname
$ django-admin startproject mysite
This command will create a mysite directory in your current directory. After the creation the structure will look like :
mysite/
    manage.py
    mysite/
        __init__.py
        settings.py
        urls.py
        asgi.py
        Wsgi.py
The outer mysite can be renamed. I’ve renamed it as “django_crud”. It looks like this:
django_crud/
    manage.py
    mysite/
        __init__.py
        settings.py
        urls.py
        asgi.py
        Wsgi.py
For more information regarding the above structure visit the link here.
After creating the django_crud application with all the above-mentioned files, we need to create an app.
Command – 2:
python3 manage.py startapp appname
$ python3 manage.py startapp student
The app will be created with the name “student”. This app will have some in-built files which will be created such as:
- admin.py
- apps.py
- models.py
- tests.py
- views.py
We need to create a new file named “urls.py” inside the app. After adding the urls.py, the file count inside the app will be 6.
In this blog, I’ll not be doing anything on the admin side.
- apps.py – This file is created to help the user include any application configuration for the app.
- models.py – Database related tasks are performed in this file.
- tests.py – Test cases are written in this file.
- views.py – Functions are written in this file which will have the respective Html template.
- urls.py – This file contains the routing of the app.
After knowing about the various files, we should also know where the Html templates will be written. HTML templates are written inside the template folder.
ALSO READ: MongoDB In Golang With Examples – A Beginner’s Guide
The template folder must be created outside the app folder which is created by the user. For having different templates for different apps, we can create another folder inside the template folder. Doing this we can reuse the template folder. I have created a folder named “student” inside the template folder. Inside the student folder, we will have our HTML files.
Command – 3:
python3 manage.py makemigrations appname
$ python3 manage.py makemigrations student
Command – 4:
$ python3 manage.py migrate
Command – 5:
$ python3 manage.py runserver
The commands 3, 4, 5 should be executed after building the application.
Code With The Respective Output
Python Code Snippets
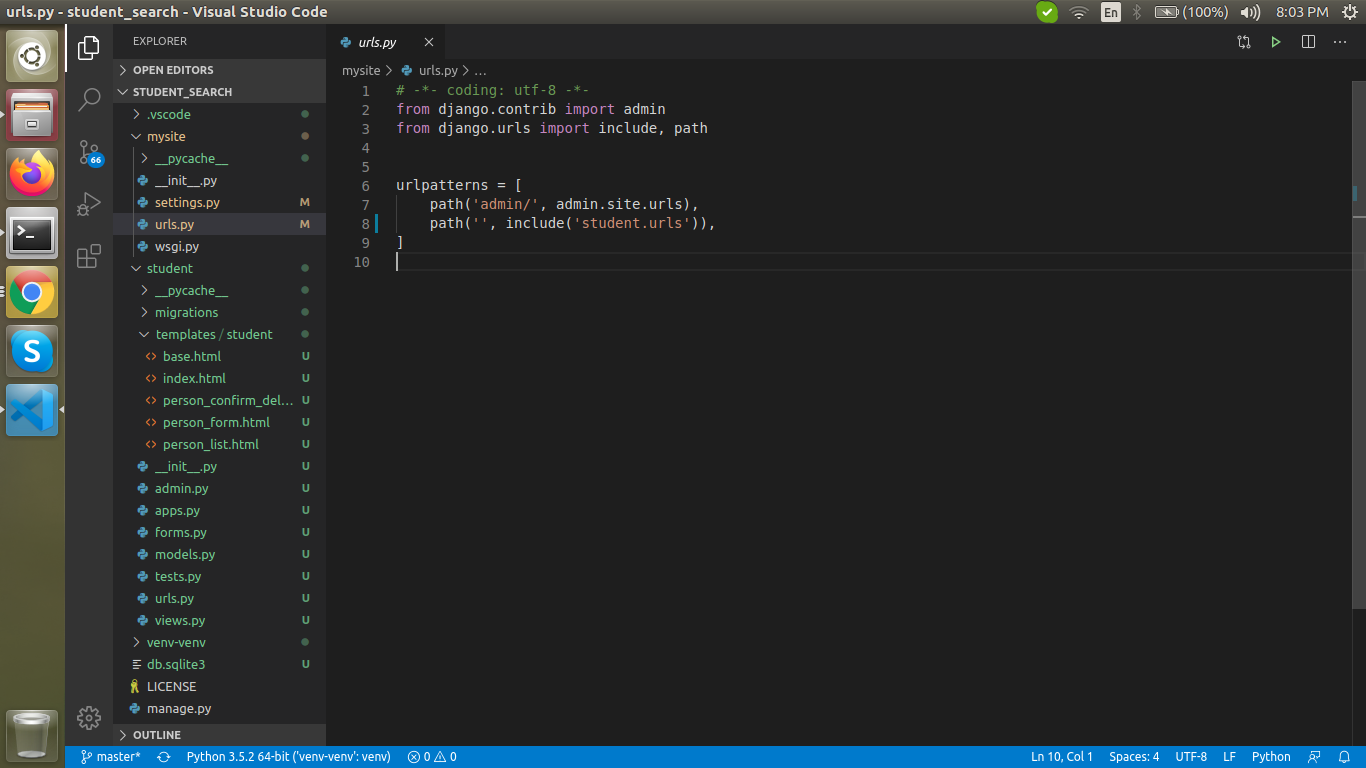
Mysite > urls.py
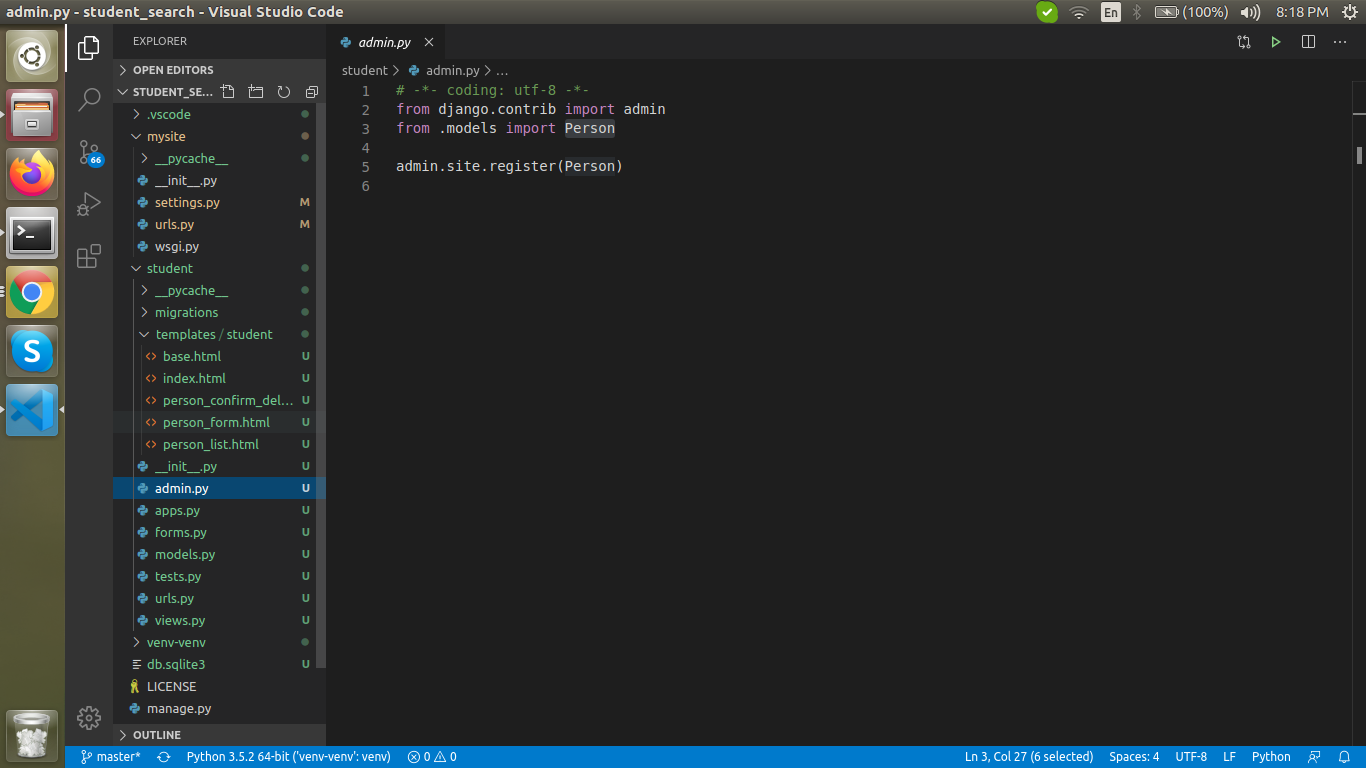
admin.py
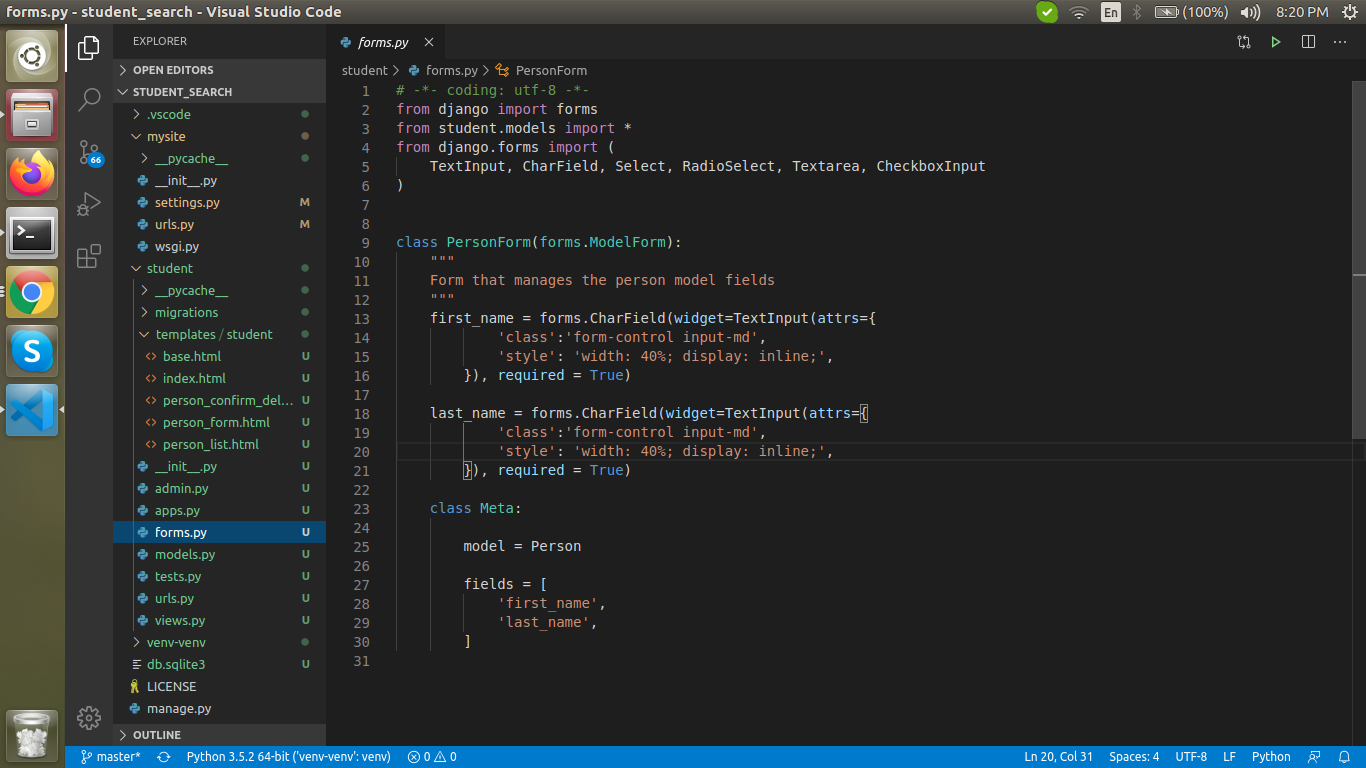
form.py
models.py

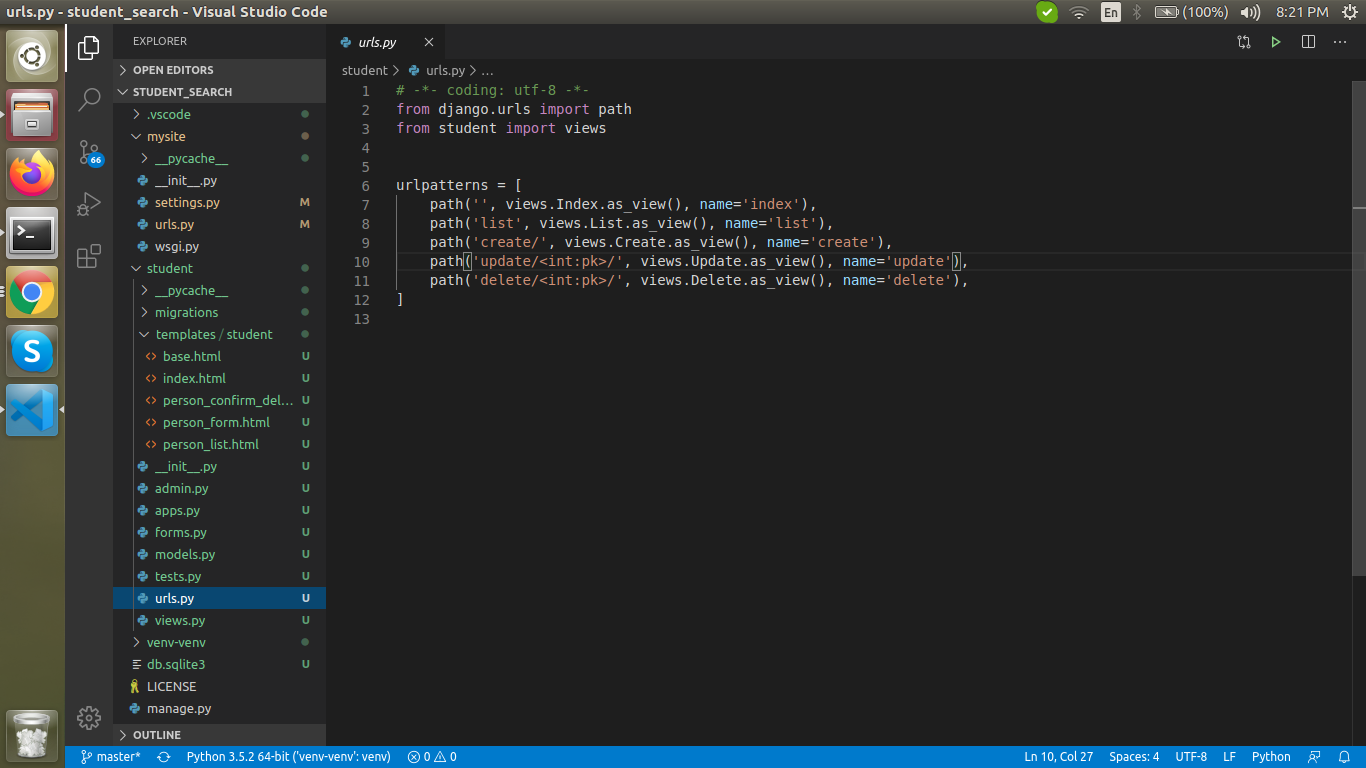
student > urls.py
views.py
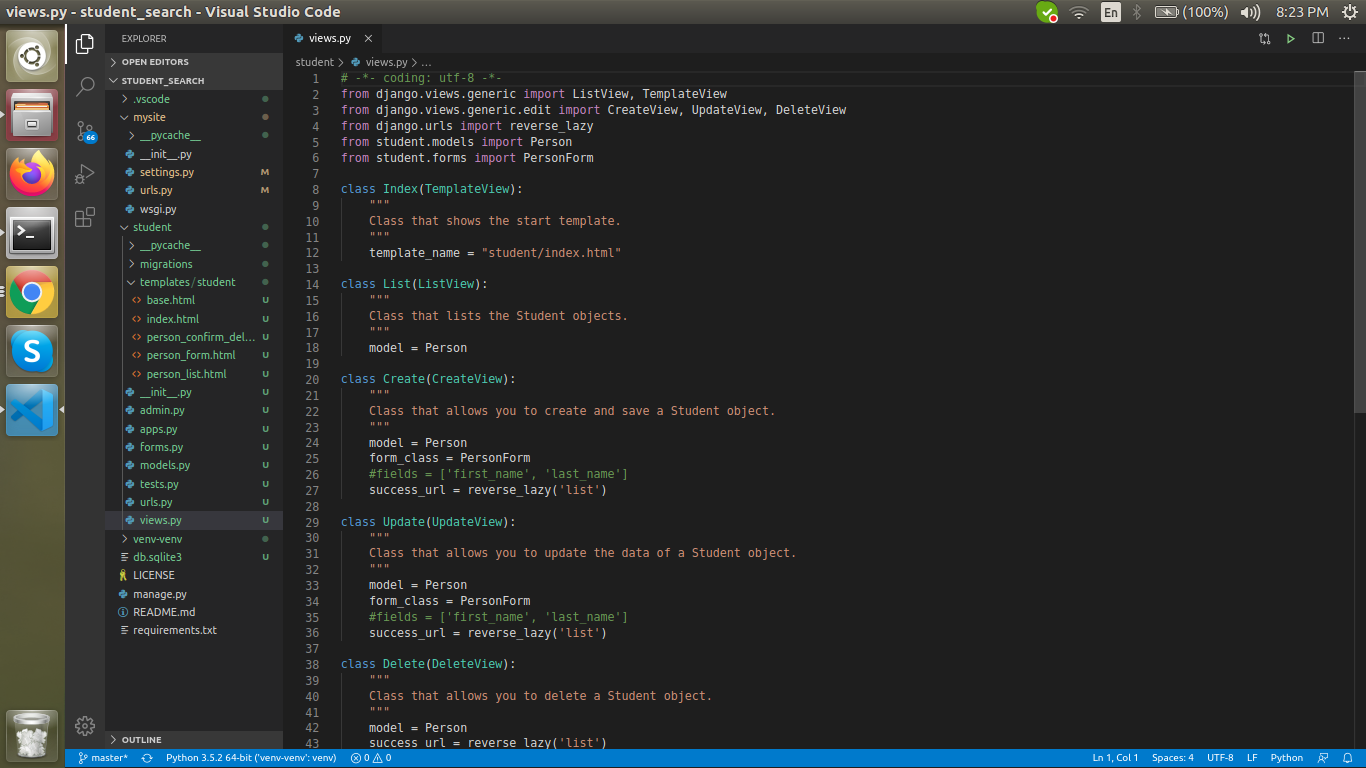
HTML Templates
HTML Code:
base.html
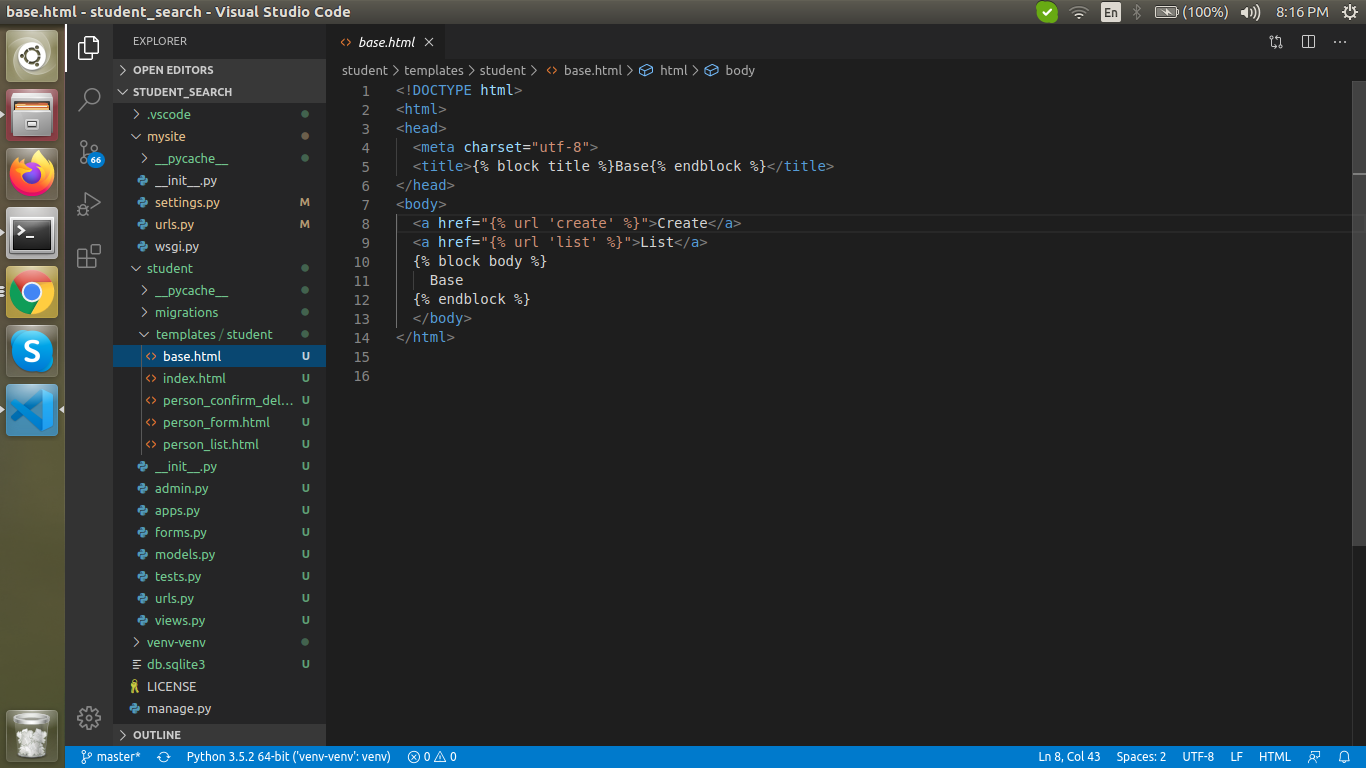
HTML Code:
index.html

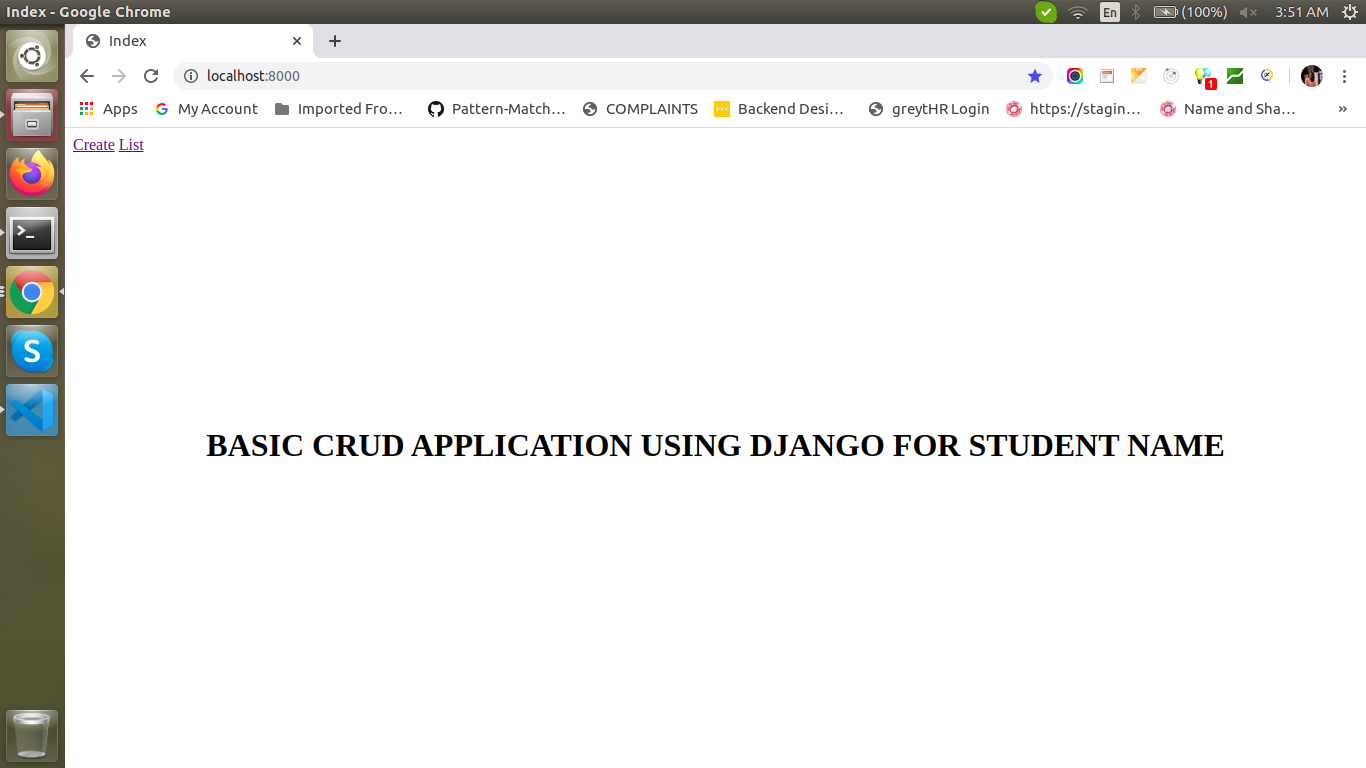
Output:
Index.html – Homepage
HTML Code:
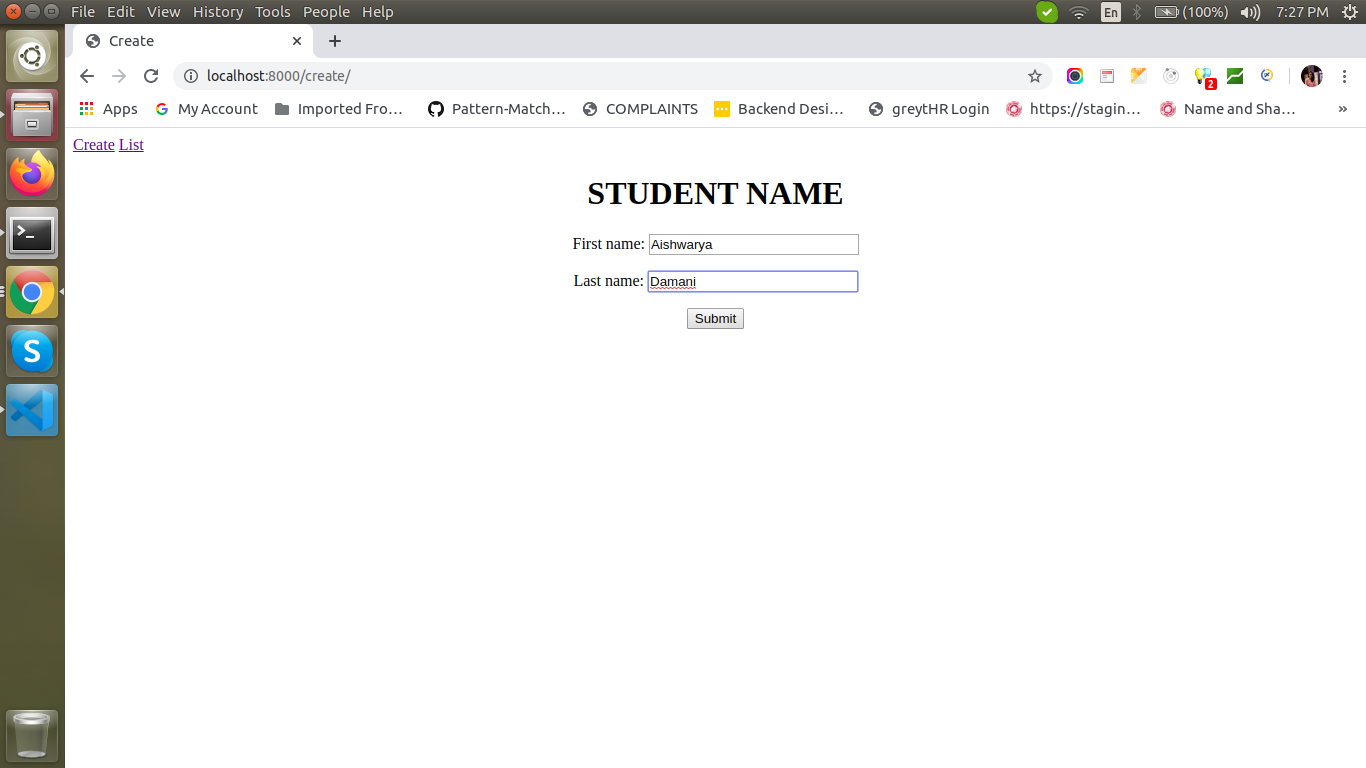
person_form.html
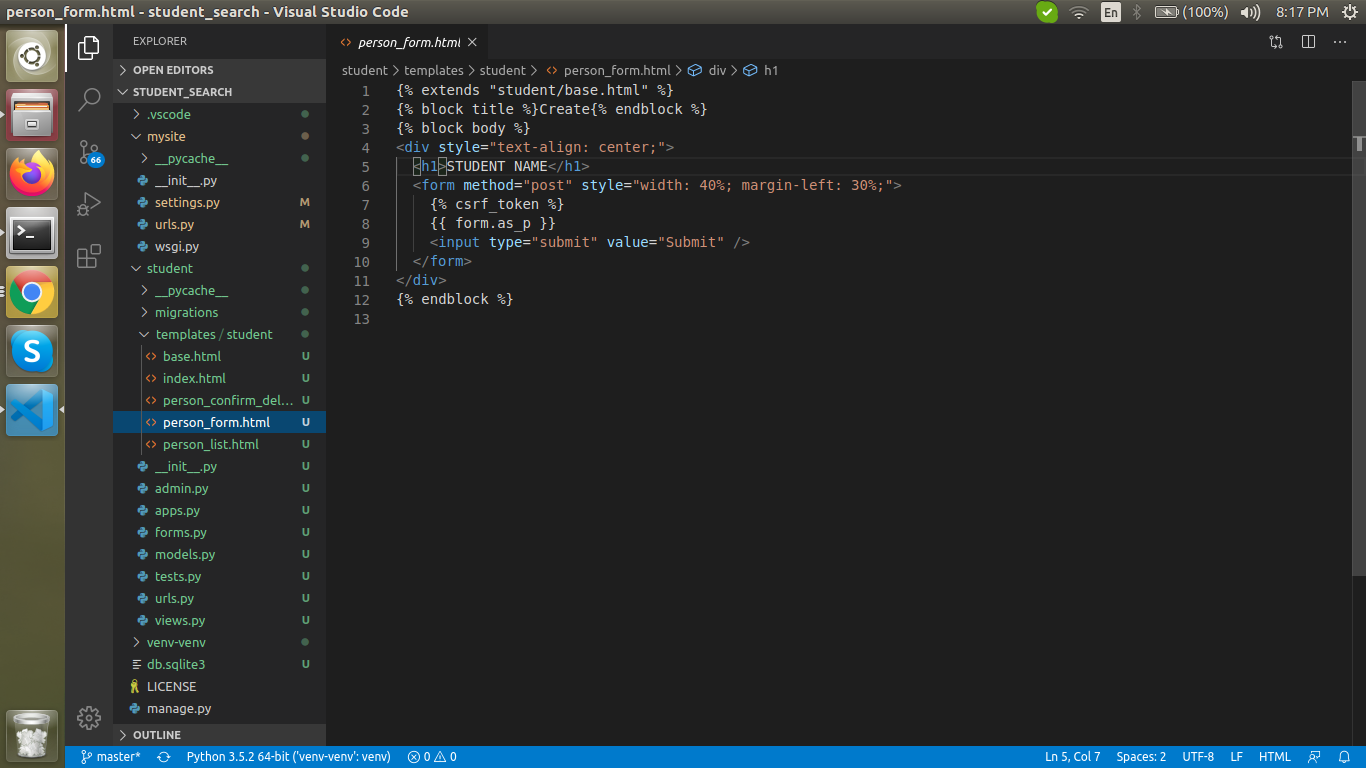
Output:
Person_form.html – Creation of the student name:
HTML Code:
person_list.html
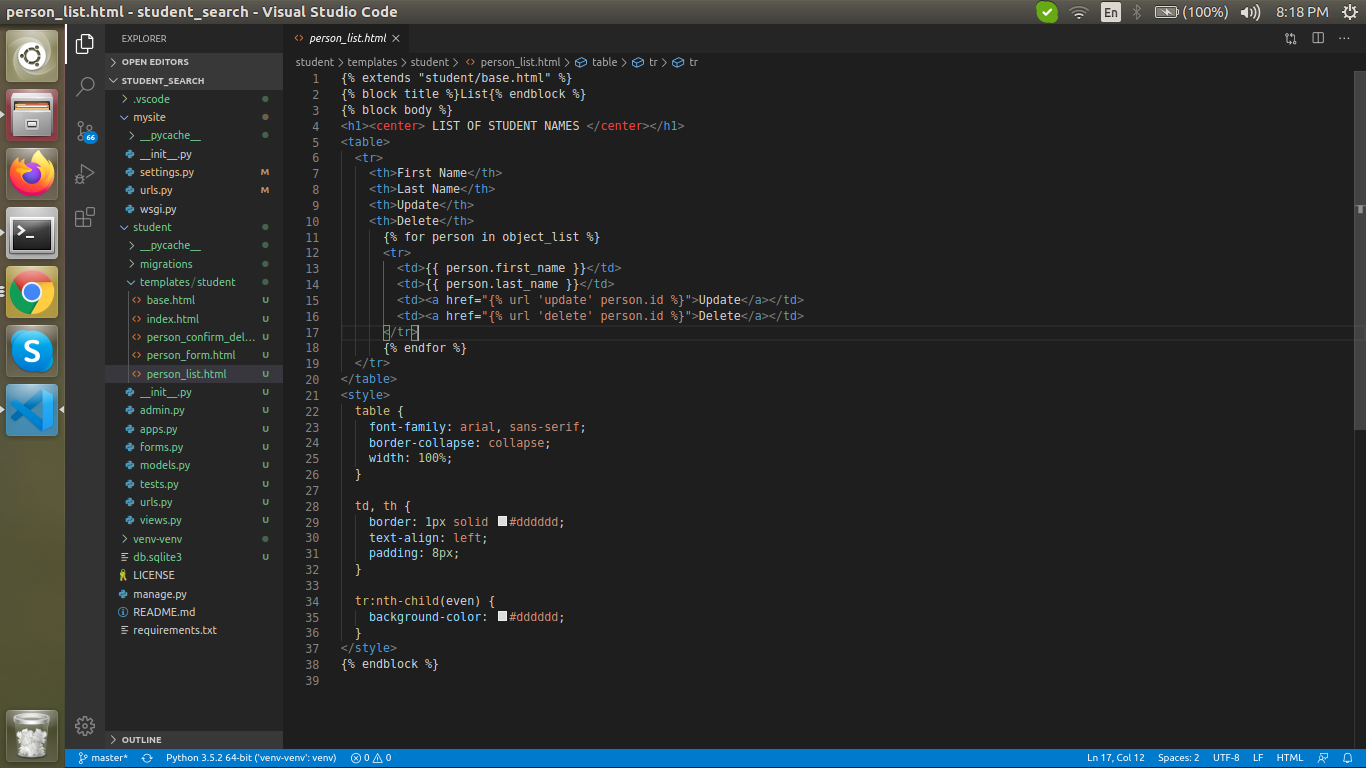
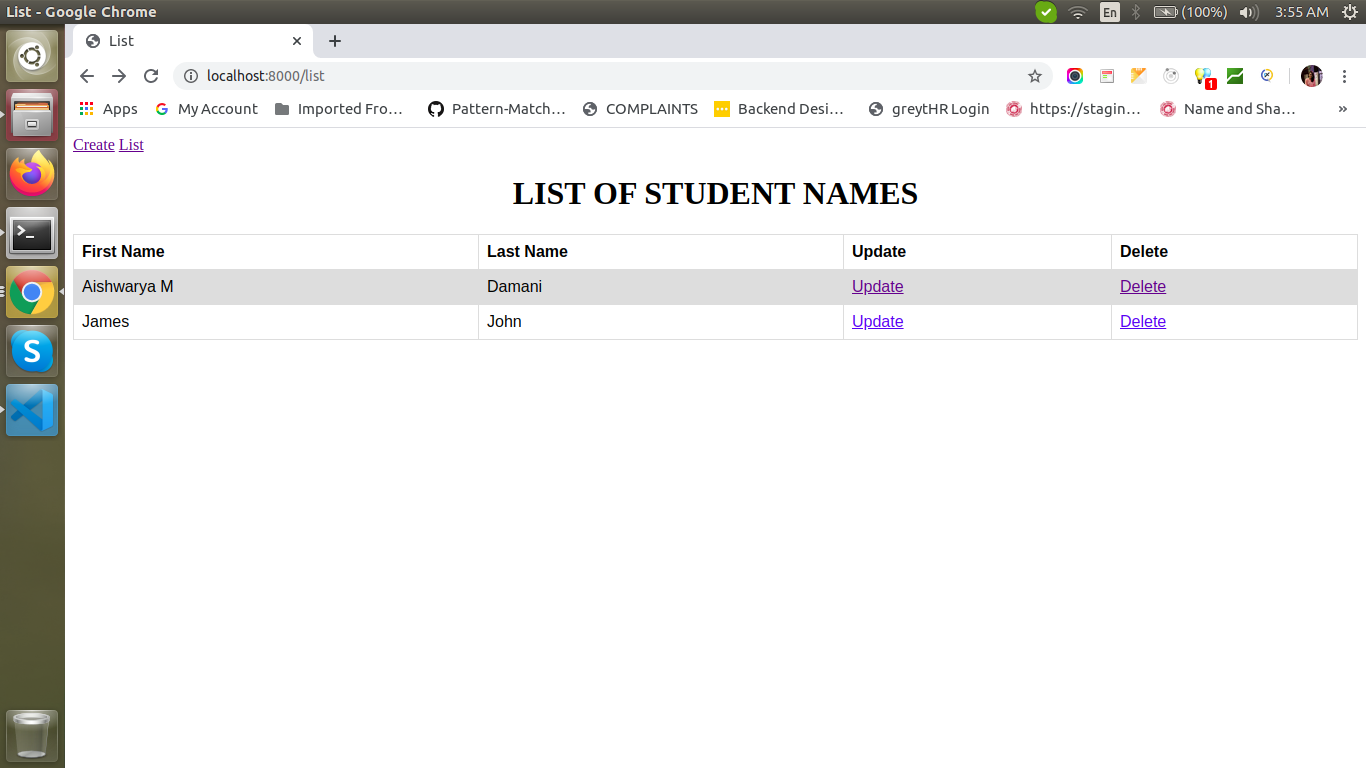
Output:
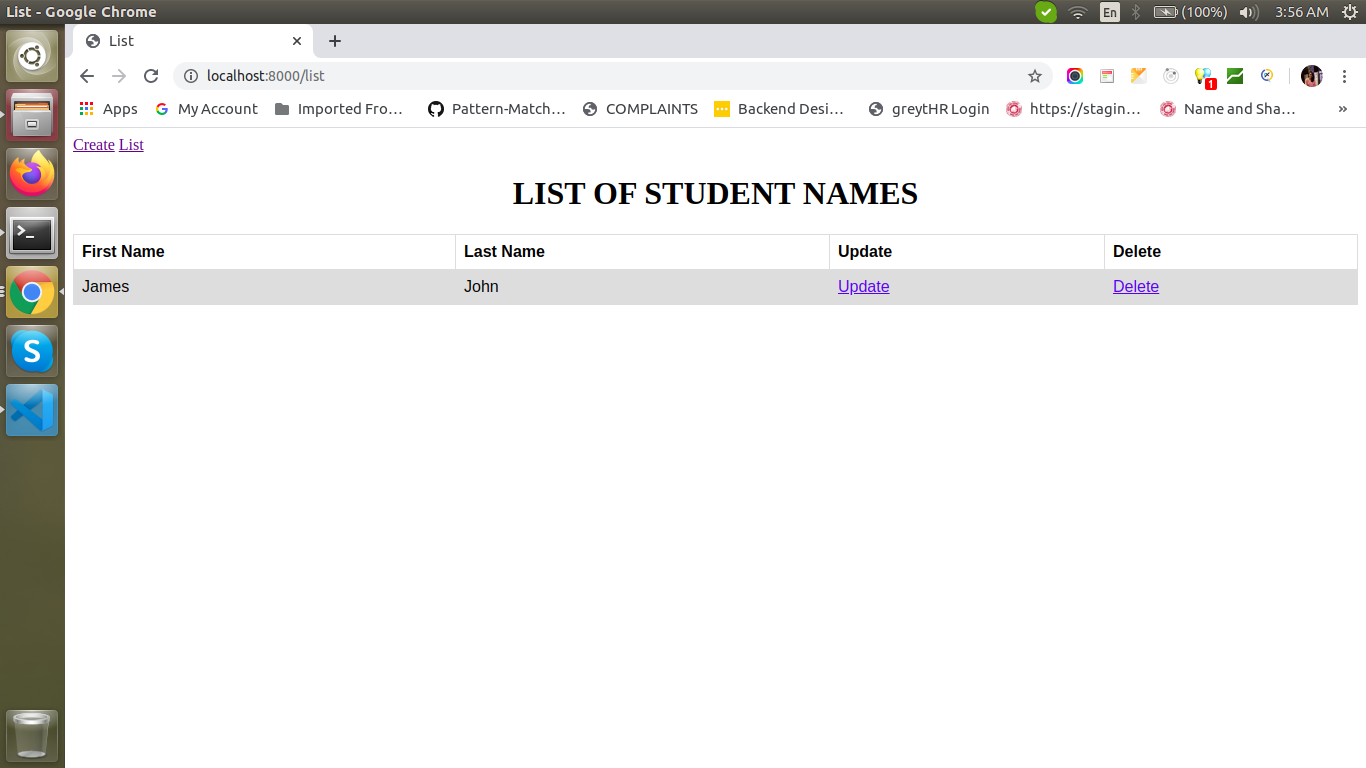
Person_list.html – Listing the students names

Updating student name

Listing of student names after update.
HTML Code:
person_confirm_delete.html
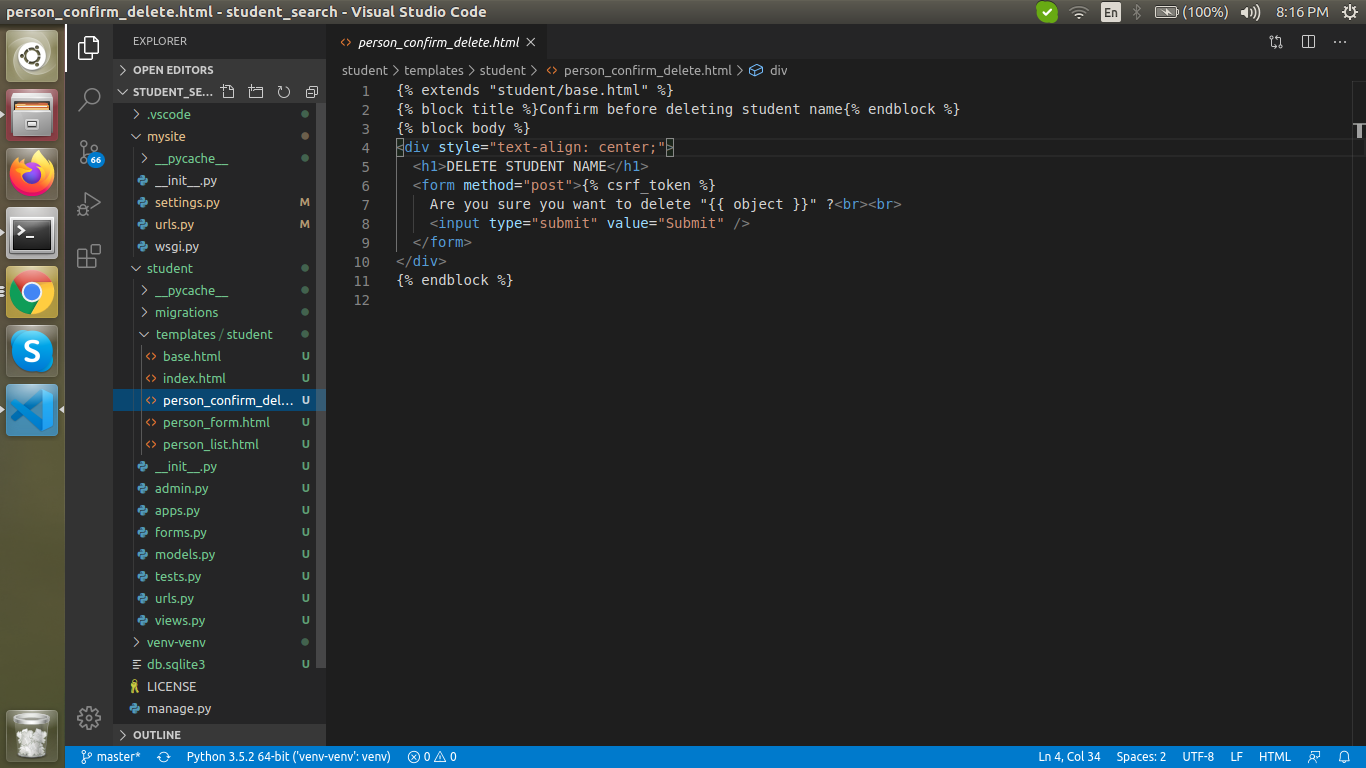
Output:
Person_confirm_delete.html – Deleting student name from the list

List of student names after deleting
This is all for a simple CRUD operation in Django. If you have any queries feel free to comment. Keep learning new things and Keep Practicing. Enjoy learning and coding.
Do you find it interesting? you might also like these articles. Top 10 Best Tech Companies For Employees To Work In The USA In 2020 and Top 10 IT Staffing and Recruiting Agencies in the USA.
If you have a business idea in your mind and in search of a reliable web development company, you are in the right place. Hire the best Python developers in the industry from Agira technologies.