Amazon Web Services (AWS) is one of the best hosting services. AWS provides free-tier EC2 instances to host small applications or to do the practice. But if you want to host a large scale application that needs efficient performance, it better to go with the priced instances based on the use case.
AWS S3 has an option to host a static application. You can host any amount of data for a range of use cases at a very low cost. It offers good performance and scalability by default. In this blog, we will learn how to host a static web application on AWS S3 (simple storage service).
You also have to note that, AWS S3 does not support server-side scripting.
Let’s start to host a simple static website into the S3. And, that also contains client-side scripting which it will execute on the client-side.
Steps to host a simple static website on AWS S3
- Create an S3 bucket
- Configuring it as a Website
- Un-blocking public access settings
- Adding a bucket policy
- Uploading static web application
- Testing the Website
1. Create an S3 Bucket
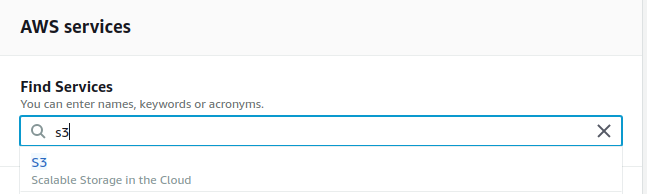
To create an S3 bucket, Sign in to the AWS console. Once you have signed into the AWS Management Console, you can notice the search box to find the AWS S3 service and click on it to checkout into the S3 service.
Once you move to the S3 console, you will notice a button to create a bucket. Once you click it, it will open a popup to collect your bucket information like shown in this image below.
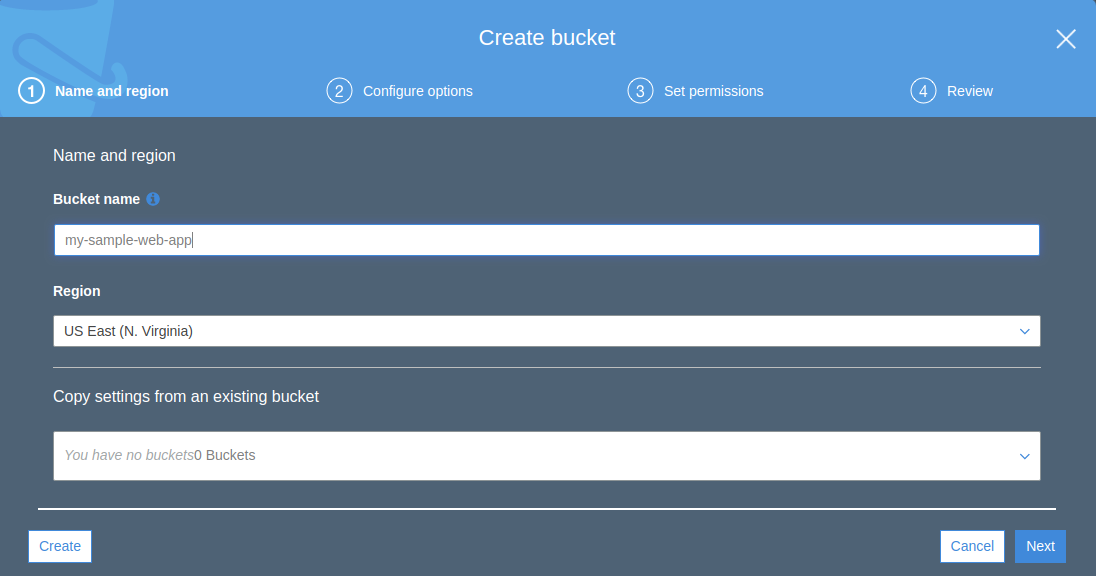
Enter your bucket name without capital letters and special characters. It will allow hyphen(-).
Note: The bucket name must be unique across all existing buckets in the AWS S3.
The bucket name will be enough. You’ll need to update default configurations, directly to click on Create button instead of Next. Now, we have created a bucket successfully, now we have to update the configuration to the created bucket as Website.
2. Configure S3 bucket as Website
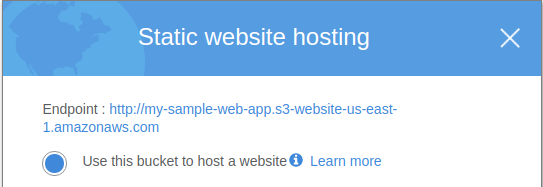
Click on the bucket name and move to the Properties tab. There you can notice the Static Website Hosting card from the list of cards. Once you click it, the card will expand with options like this.

Choose the first option, and it will ask about the Index document of your Web application. The index document is a home or default page of your website.
Give an error document name as well and save it. We have updated our bucket configuration as a website.
3. Un-block public access settings
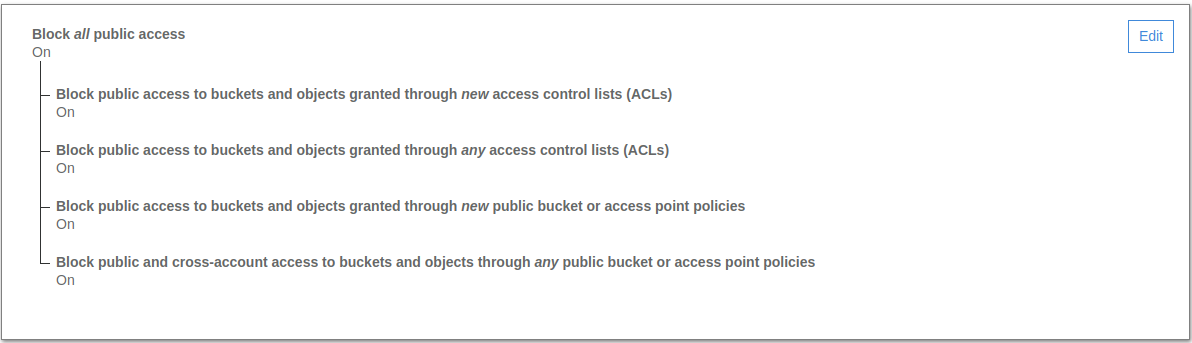
There is another tab Permissions next to the Properties. Move to the Permissions tab and there you can notice one button Block public access which already highlighted.
While creating a bucket, AWS service will block public accesses by default to secure the bucket. But, in this case, we have to expose our website to the public. So, we have to un-block public access settings here.
There you can notice a card with accesses list like below with an Edit button, click on it.
Un-check the top/first checkbox and click on the Save button, it will open a popup to get confirmation from you. Type the ‘confirm’ in the field and click on the Confirm button, to grant public accesses to the bucket.
Note: Don’t keep sensitive data or files in this bucket. Because all objects from this bucket are openly accessible to the public.
4. Add Bucket Policy
Update the bucket policy with only read action to all users without any user restrictions.
In the same tab Permissions, we can notice another button Bucket Policy to update the policy. Once you clicked on it, you can notice the text area with a group of actions at the top right side. Copy the below JSON content and paste it at the Bucket policy editor.
{
   "Version":"2012-10-17",
   "Statement":[{
       "Sid":"PublicReadForGetBucketObjects",
       "Effect":"Allow",
        "Principal": "*",
       "Action":["s3:GetObject"],
       "Resource":["arn:aws:s3:::BUCKET_NAME/*"
       ]
     }
   ]
 }
Replace the BUCKET_NAME with your actual bucket name and Save it. In the Action list, you can notice that we have given only GetObject action, it means you will be able to retrieve objects from the given resource. If we mention Principal value with ‘*’, it won’t do any access authentication, through this Principal we granting permission to everyone.
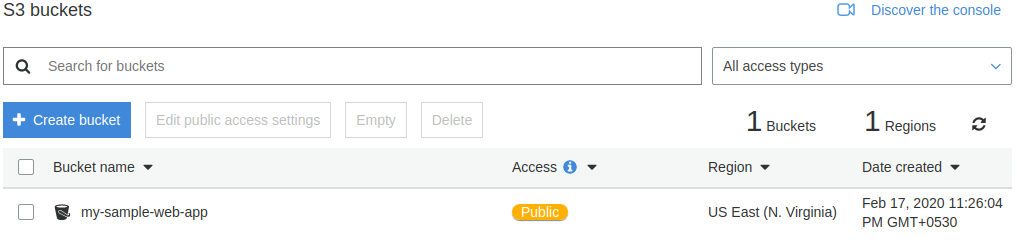
If you go back to the buckets list, there you can notice the bucket name with public access like below,
5. Upload the static Web Application
Now, we reached the final step to finishing hosting a simple website on AWS S3. Let’s upload or copy our static web application into the S3 bucket.
I suppose you have an application structure looks like below,
my-sample-web-app
├── CSS
│ └── styles.css
├── images
│ └── agira.png
├── error.html
└── index.html
Checkout to the my-sample-web-app from your system terminal and use the below command to copy all files into the S3 bucket.
$ aws s3 cp --recursive . s3://my-sample-web-app/
If you are not comfortable with the terminal, open the bucket from your AWS S3 console and click on the Upload button to upload static HTML files into the bucket. It will not support upload folders like CSS and images. For those sub-directories, we have to create folders manually in the S3 bucket, after upload files into the corresponding directories.
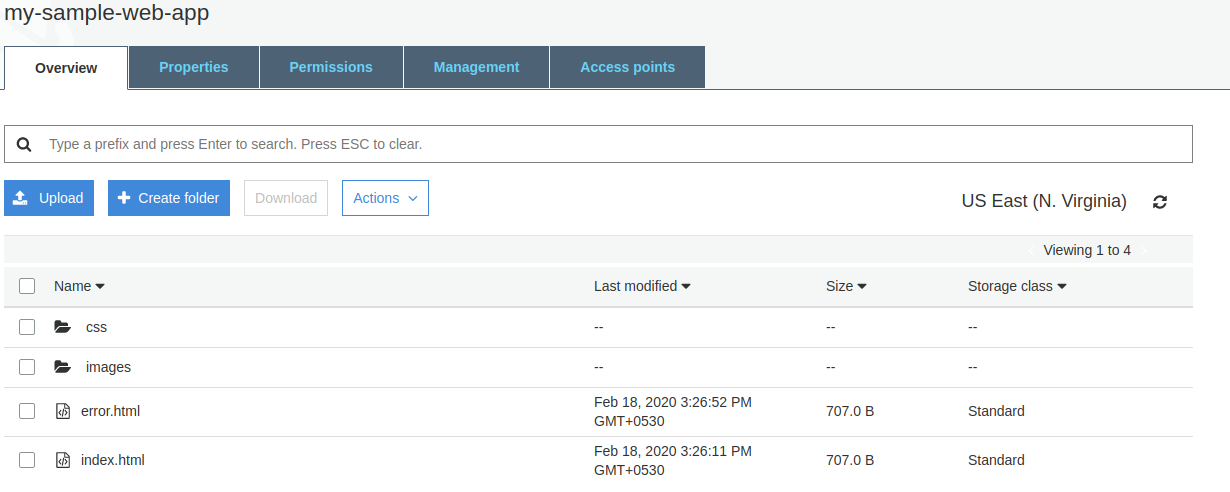
You can notice your uploaded files in the S3 bucket like below,
6. Testing the Website
We have now completed hosting a simple static Website on AWS S3. To test the website, you can find the endpoint in the Static website hosting card which is available inside S3 bucket Properties.
 Once you click on that link, it will render your website. That’s simple it is to host a static website on AWS S3.
If you want to use the custom domain for your website, you can follow this document to learn how to use it. If you want to speed up your website through CloudFront, get to know how you can do it from this document.
Conclusion
Hope you’ve got something useful from this tutorial to create a simple static website in AWS S3. If you have any doubts or stuck somewhere between the steps, comment your queries in the comment section. We are always ready to help you.
Other useful resources
- How To Upload Images/Files To AWS S3 Using Node.js
- How To Deploy A Node.js App To The AWS Elastic Beanstalk
- Deploy Python Flask Application In AWS Lambda
- AWS VPC Automation Setup in Ruby
Don’t forget to subscribe to the weekly newsletter for more exciting articles and tutorials on web development.
Searching for perfect DevOps solutions for your new project? Consult our DevOps engineers to get ideas displayed to the world with our technology solution. Let’s discuss, schedule a call today!