CanDeactivate Route Gaurd is an interface. This guard is helpful in making a decision to deactivate a route or not. if CanDeactivate guards return true, navigation will continue, or else the navigation will be canceled. Basically, this guard used to switching to one router to another. When you leave one component and then move to another component. Using a router CanDeactivate you can check if the user is willing to move to the next page.
CanDeactivate File Setup
This blog is a clear explanation of how you can use the CanDeactivate router guard in Angular. if you are new to this, let’s set up a basic Angular CLI with the command. If you already have an Angular app, you can skip this step.
Now, lets set up a file ng new angular-canDeactive to work in this blog. You can name your Angular app name as you wish. “angular-candeactive” is Angular app name here.

CanDeactivate Route Guard In Angular
In this case, I’ve created contact and home component. Then add the router based on navigation. Now we will create a two-component.
- Navigate to the home component
- Navigate to contact component
Now app-routing.ts file as follows,
import { NgModule } from '@angular/core';
import { Routes, RouterModule} from '@angular/router';
import { HomeComponent } from './home/home.component';
import { ContactComponent } from './contact/contact.component';
const routes: Routes = [
  { path: '', component: HomeComponent},
  { path: 'contact', component: ContactComponent },
  { path: '**', component: HomeComponent },
];
@NgModule({
  imports: [RouterModule.forRoot(routes)],
  exports: [RouterModule]
})
export class AppRoutingModule { }
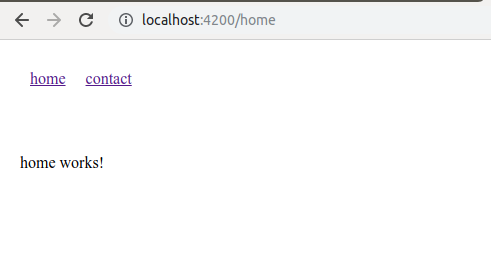
After you configure the router file you can able to navigate the contact component. In my case home is a default. The result will look like this.
Now we are ready to implement CanDeactivate function to contact component. Once you leave the component to execute some other functionality, it will display a confirm popup. For instance, create one angular guard file. This helps in identifying the router change. In my case, I have added can-exit.guard.ts & CanExit.ts file. Take a look at the can-exit.guard.ts file in the display.
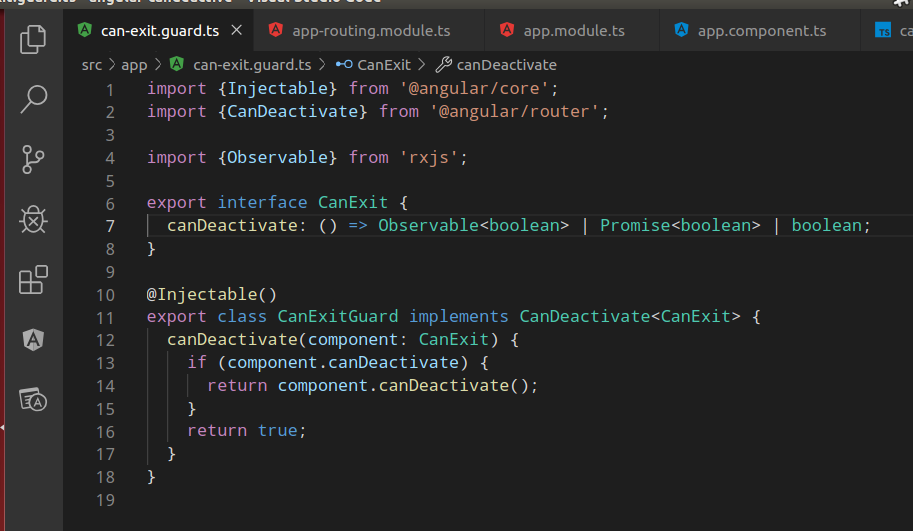
import {Injectable} from '@angular/core';
import {CanDeactivate} from '@angular/router';
@Injectable()
export class CanExitGuard implements CanDeactivate {
canDeactivate(component: CanExit) {
if (component.canDeactivate) {
return component.canDeactivate();
}
return true;
}
}
CanExit.ts – This file is used to return the promised value.
import {Observable} from 'rxjs';
export interface CanExit {
canDeactivate: () => Observable | Promise | boolean;
}
After you add the above files in your application configure the router file as follows. Once you are in the contact component and the move to some other component using a router that will work in the CanDeactivate router method.
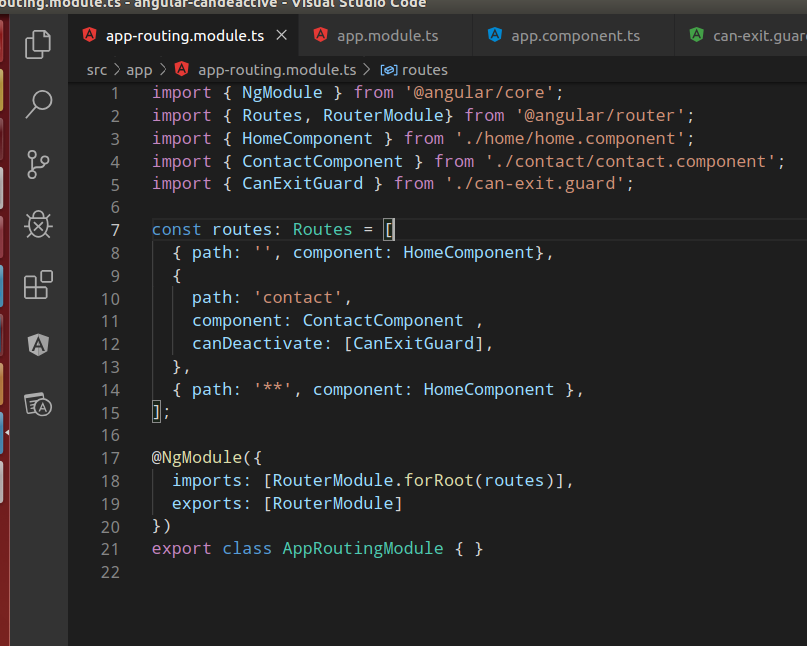
import { CanExitGuard } from './can-exit.guard';
const routes: Routes = [
{ path: '', component: HomeComponent},
{
path: 'contact',
component: ContactComponent ,
canDeactivate: [CanExitGuard]
}
];
Contact.component.ts file looks as follows.
import { Component, OnInit } from '@angular/core';
import { CanExit } from './../can-exit.guard';
@Component({
selector: 'app-contact',
templateUrl: './contact.component.html',
styleUrls: ['./contact.component.scss']
})
export class ContactComponent implements OnInit, CanExit {
constructor() { }
ngOnInit() {
}
canDeactivate(): Promise | boolean {
return true;
}
}
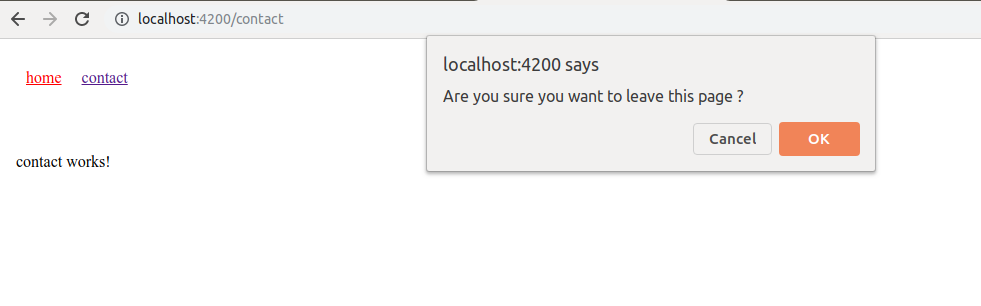
When you have set canDeactivate return value false, you are not switching another router until it’s set to true.
canDeactivate(): Promise | boolean {
const confirmResult = confirm('Are you sure you want to leave this page ? ');
if (confirmResult === true) {
return true;
} else {
return false;
}
}
Now if you are trying to move from the home page to the other, it shows confirmation popup as shown in the below image. If you select OK, it will move the home to the contact page or otherwise, you will remain on the same page.
Git Link: https://github.com/agiratech-manigandan/candeactivate-angular
Found this blog helpful? Follow us on social media and Don’t forget to subscribe for the weekly newsletter for more Angular updates and new trending posts across the technology world.