Smartphones expand the horizons inside your palms, everyone can be easily traced or tracked in just a few seconds. By simply sharing any location, Finding the exact location through the mobile map apps, it easy for us to reach our destination in minimal time. Geographic information system technology makes it possible. All the location information is captured as geographic coordinates such as latitudes and longitudes.
But, what is Geocoding and Reverse Geocoding?
Geocoding is a process when the address of a place (location information) is fed into the system. It converts the address into location information with maps. Reverse geocoding is converting the location information into a textual address.
Let’s assume you want to visit a shopping mall for the very first time. You browse by a name or address. The background process of this technology is Geocoding. With geocoding, you plot the location information on the map and know the distance between the two points. Travel duration and suggestion of the best way to reach the destination.
But do know how an address is converted as location information and vice versa. GIS engineers use the basic process of interpolation. The basic data for interpolation is street layers. It is considered as a coordinated system of the real world. The address information is dumped on every street segment. If you want to locate any address on the map, the system will interpolate the user input values using the base street layer data and plot the desired location on the map.
The process is pretty interesting to market as every day new apps are being launched which uses geocoding and reverse geocoding process.
In this blog, we will discuss the process of geocoding and reverse geocoding using QGIS.
Geocoding & Reverse Geocoding using QGIS
QGIS or Quantum GIS is an open-source cross-platform application used for Geographic Information Systems (GIS). It is an application that supports editing, viewing, composing, exporting graphical images and analysis of geospatial data.
In this blog, we are going to use 3 plugins to try out here,
- Geocoding
- MMQGIS
- TravelTime Platform Plugin
1. Geocoding
This plugin allows a user to obtain geographic coordinates of a location knowing its address, the geocoding process is handled by Google web services. Additionally, the Geocoding plugin allows “Reverse Geocoding”, i.e. to obtain an address, from the point coordinates. All geocoded points are automatically added to a point layer.
Now, Let’s learn how to install the plugin with step by step instructions,
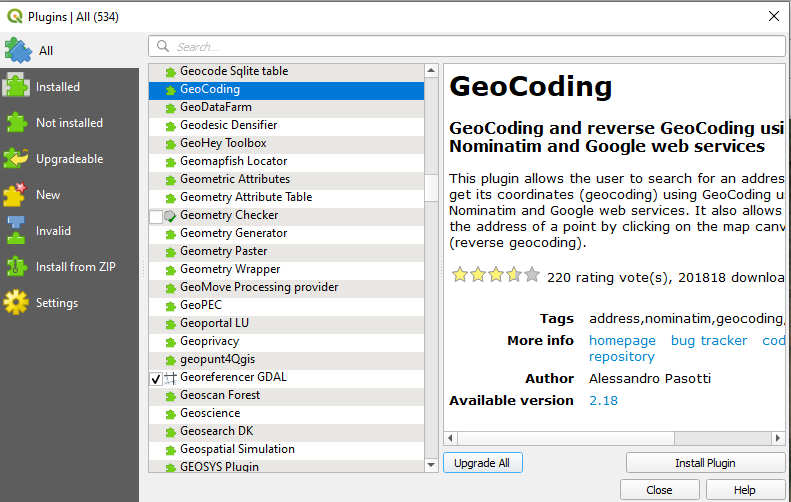
Geocoding Plugin Installation
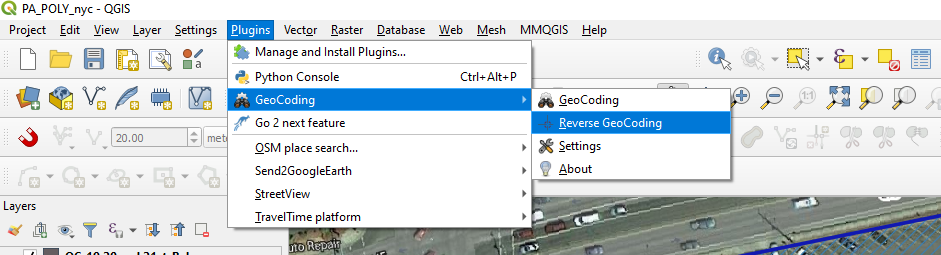
To install go to, Menu toolbar > Plugins >Manage and Install Plugins > All > Geocoding. Take a look at the image below,
Viewing The Results
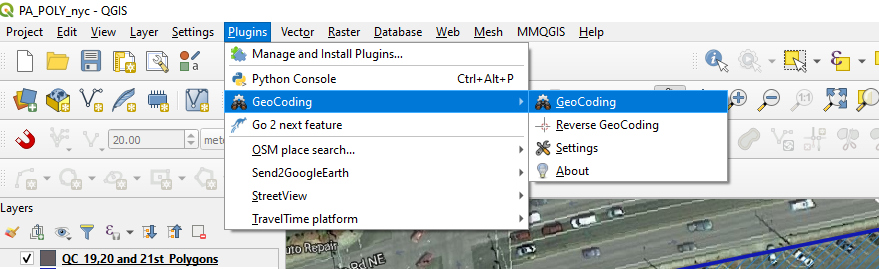
For the Geocoding plugin, Select Plugins > Geocoding > Geocoding.
A popup window will appear to search for your address. Search an address in that window you want to geocode, and it gives you a geographical point in the temporary scratch layer format. And the result will be shown in the point format and the address is saved in an attribute table.

To Reverse geocode, select Plugins > Geocoding > Reverse Geocoding.
You’ll find the address of a specific point used by selected coordinates from the map. When selected, you can click on the map of the location that want to address. Once the location has been selected, a popup window will appear, it contains the address of the selected location. It will give something like this in the image below.

2. MMQGIS
MMQGIS is a set of Python plugins for manipulating, analysis and visualization of vector map layers and it also provides geocoding services. It also has a user-friendly interface and it is used as in Google’s geocoding API (Paid), Openstreetmap/Nominatim(free), US Census Bureau(free) and ESRI Server(Paid). Numerous APIs are available for free as well as paid.
MMQgis Plugin Installation
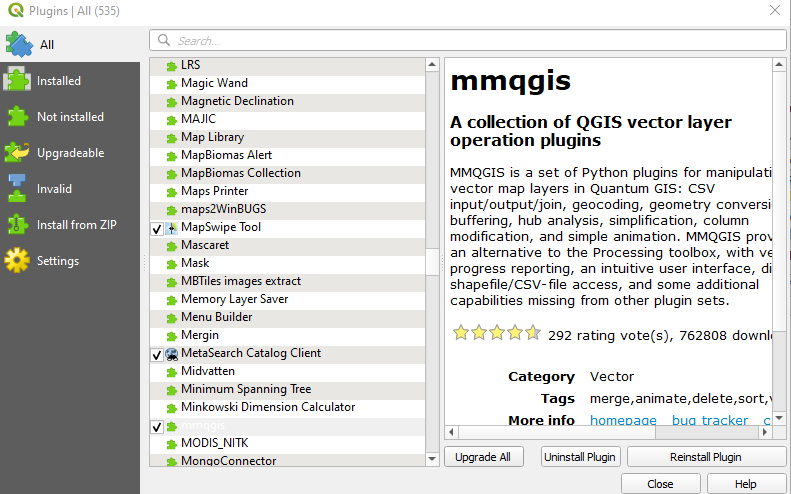
To Install go to, Menu toolbar > Plugins >Manage and Install Plugins > All > MMQgis
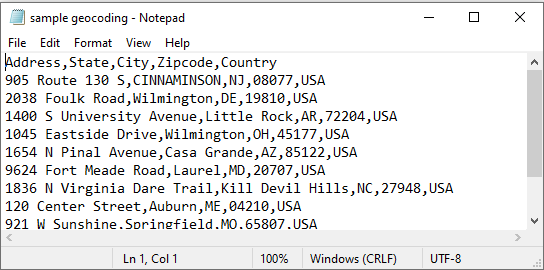
There are some basic data standards to geocode. Addresses should be formatted in a text format CSV with a comma (,) Separator. To avoid errors while geocoding, the geocode data should consist of Street Name(address), City, Country. If u give a clear and accurate address(street name, city, state, zip code, country) the accuracy will be comparatively high.
The field title names on the first line of the file, separated by commas, and then addresses to geocode are entered one by one line of the file.
Viewing The Results
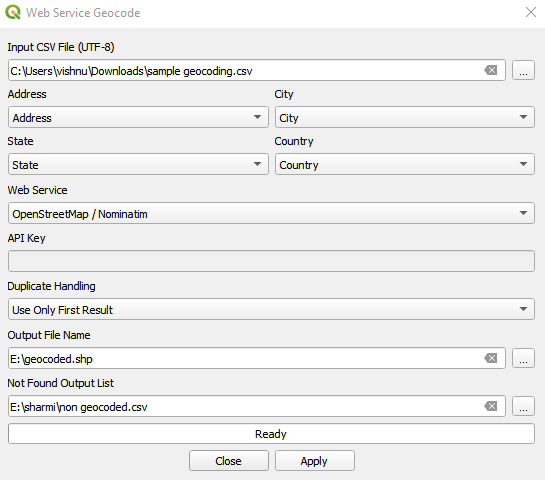
To Geocode, select MMQgis > Geocode > Geocode CSV with Web Service.

Apart from QGIS API, Openstreetmap/Nominatim is used to geocode all over the world, but the USA exclusively uses US Census Bureau. So, here we’ve used Openstreetmap/Nominatim, now you should browse the folders for inputs, Geocoded Outputs, and Non-Geocoded Outputs. Geocoded output in shapefile format and non-geocoded output are in text file (CSV) format.
To Reverse Geocode, select MMQgis > Geocode > Reverse Geocoding
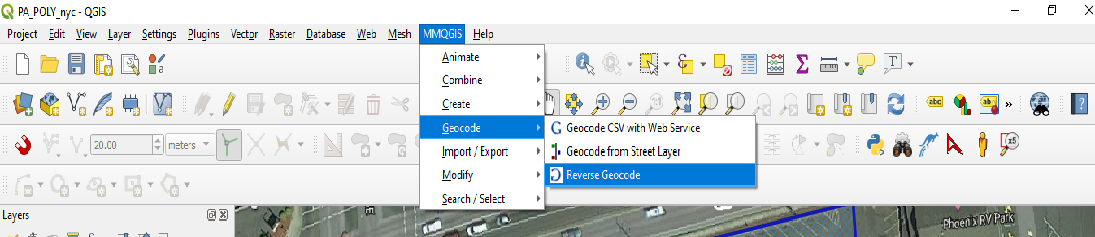
After you selected the Reverse Geocode option, Reverse Geocode window popup. Make sure that the inputs should be in Vector file format such as, shp, geojson, kml, sqlite, tab, etc., in Reverse Geocoding.
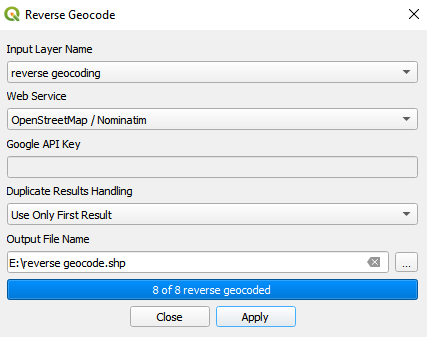
As we use Openstreetmap/Nominatim option, Output will be in Vector file format, and it has an address in a single column with a comma separator. It will give the type and category of the location.
You May also like,
Top 6 Industries For Geographic Information Systems (GIS)
3. TravelTime Platform
TravelTime platform QGIS plugin, enables users to create travel time polygons, using many modes of transport. It is also known as Isochrones. This plugin also provides free API key offers that go up to 5,000 free requests per month, with a limit of 10 free requests per minute for Geocoding services. In the initial testing, TravelTime API (free) is used by businesses for commercial purposes. (Paid API license is also available)
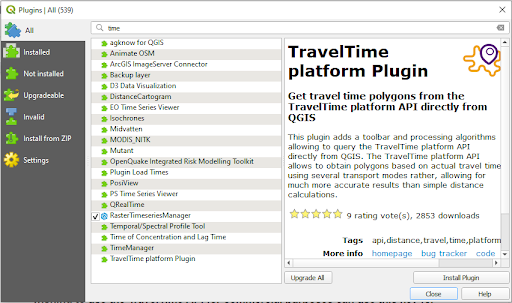
TravelTime Platform Plugin Installation
Menu toolbar > Plugins >Manage and Install Plugins > All > Travel Time Platform.
After you install the plugin, enable the processing toolbox using show the toolbox option. Then set the configuration using the Configure TravelTime platform Plugin icon in the Main Toolbox.
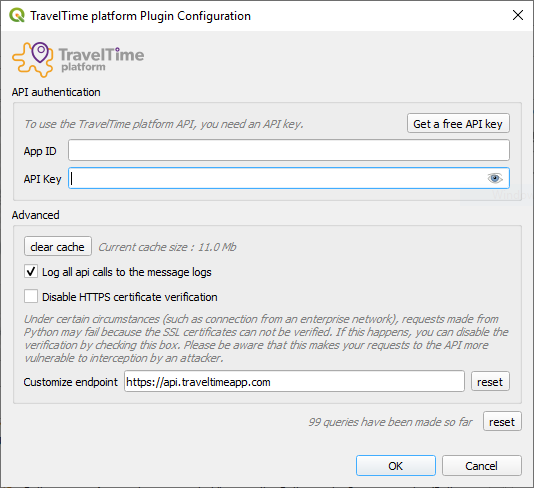
Click on the “Get a free API” button and fill the form in the TravelTime web service. You’ll get the App ID and API Key through email. Now enter your App ID and API Key in the dialogue box and click OK.
Viewing The Results
The Geocoding Option is available under the “Utilities” section in the TravelTime Platform processing toolbox.
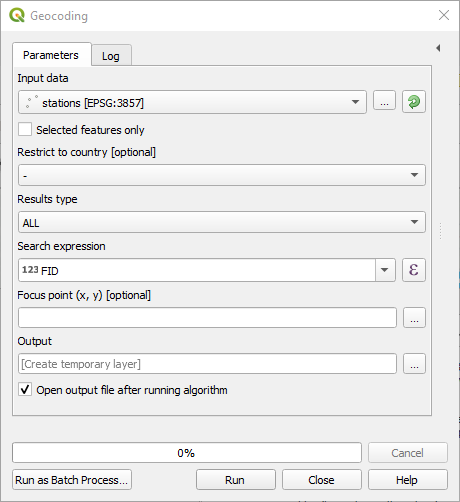
The input layer should have an address including the Street name, City, State, Zip) or Location Name. The country will be defined using Restrict to country option. It returns the results that are within the specified country.
When you browse your output location, if you save the output layer or leave it empty, the result is loaded as a temporary layer. It is possible to save the temporary layer later, by right-clicking it in the legend and choose “Make permanent”.
The Reverse Geocoding Option is available under the “Utilities” Section in the TravelTime Platform processing toolbox.

The input must have point geometries. repeat the same steps as of Geocoding options. And save the temporary layer later, by right-clicking it in the legend and choose “Make Permanent”.
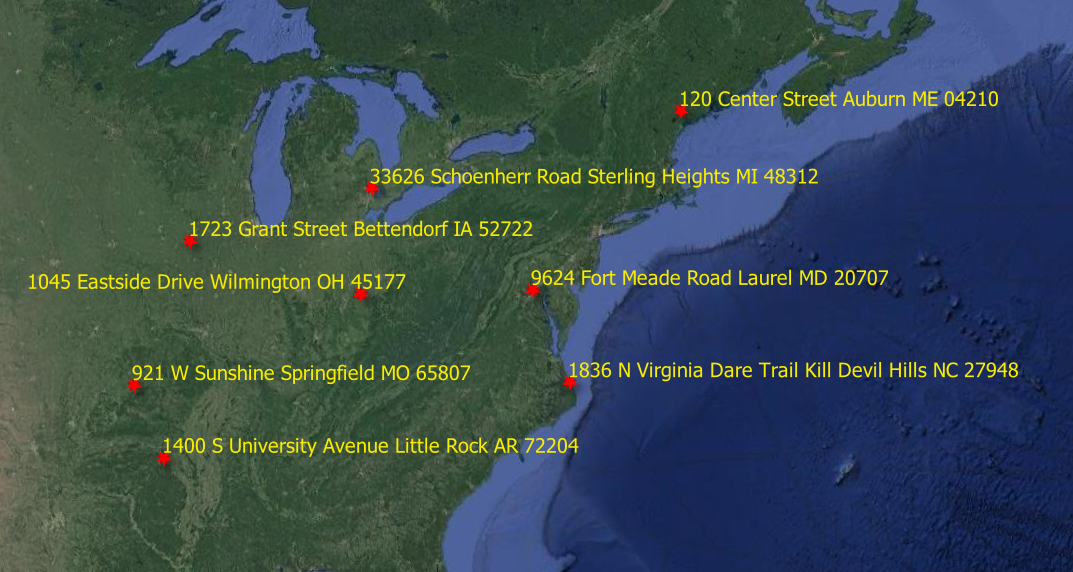
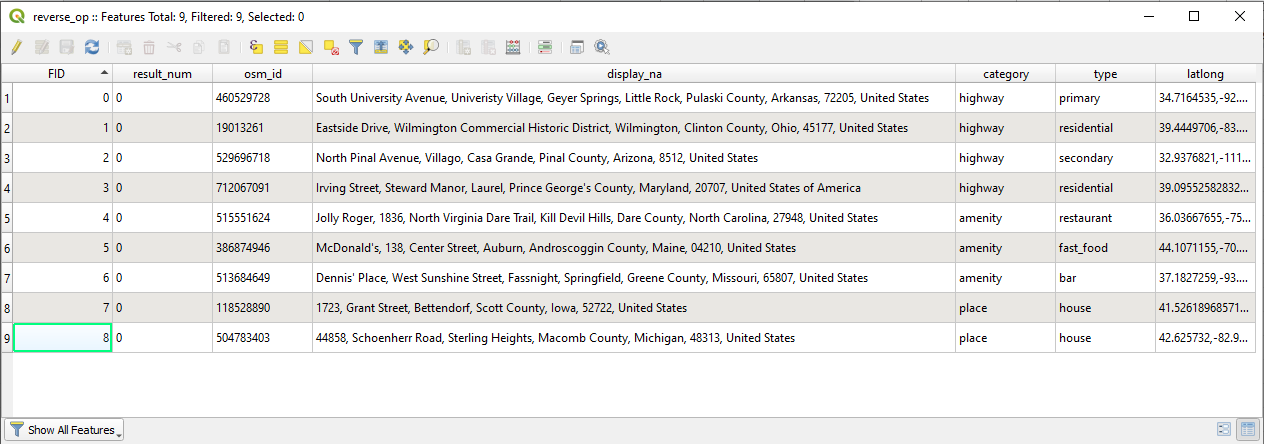
End Results of Geocoding and Reverse Geocoding using QGIS plugins
The final output of all the Geocoding process using the above-mentioned plugins will look like this. In the Reverse Geocoding process, the categories presented in the output might vary on the overall results, but the end results will remain the same. (Below images shows the results of Geocoding and Reverse Geocoding Respectively)
Final Say
I hope, these steps explained are easy for you to understand. I’ve explained the geocoding process with three plugins here. By now, you must have learned how to Geocode and Reverse geocode using QGIS API and how it works. If you are already using any other API to Geocode/Reverse Geocode, Tell about it in the comment section below.
Looking to develop GIS applications for your business? Hire a highly skilled GIS engineer to boost your project ideas!