OpenCV is a machine-learning algorithm, used to find faces within a real-time picture. Finding a face in the picture is not an easy thing. We need to consider thousands of small patterns to produce the exact picture. There are more than 6,000 classifiers in a face and all these classifiers should be matched to detect a face. If you’re wondering how to do it in a simple way then here I’m to explain to you the complete face recognition process in a step by step.
OpenCV uses Cascade Classification
What Is OpenCV & Why Do We Use?
The classifier is designed in a way it can be easily “resized”. It is more efficient to avoid resizing the actual image. Instead of finding the objects of interest in the picture at different sizes.
The scanning procedure is done several times at different scales, to find an object of unknown size.
How OpenCV Works?
Cascade typically works like a waterfall model,
1)The OpenCV cascade splits the problem of Identifying faces into multiple stages.
2) In each block, it performs a quick and very rough test. Once the test passes, it does a more detailed test. And this process goes on.
3)The algorithm has 30 to 50 of these stages, if all the result is getting passed on all the stages, only then it can detect the face.
Prerequisites For Face Recognition
- OpenCV
- Python 3
Now, Let’s get started with the codes.
haar cascade frontal face XML download
Before starting, we need an image to upload and the classifier
haarcascade_frontalface_default.xml Download from
https://github.com/opencv/opencv/blob/master/data/haarcascades/haarcascade_frontalface_default.xml
Create the folder for our project and add the face_detect.py file.
And add.
How To Import OpenCV In Python
#import
import cv2
import sys
Here we are importing open cv for our project,
# Get user-supplied values
filePath = sys.argv[1]
cascFilePath = sys.argv[2]
The line helps to pass the image file path and classifier path in the command line.
First, we should send the image path and the classifier XML path.
ALSO READ: Top Python Conferences You Don’t Want To Miss In 2019
Creating haar cascade OpenCV python
# Create the haar cascade
faceImageCascade = cv2.CascadeClassifier(cascFilePath)
Now we initialize the cascade with our classifier as this will detect the face. This loads the data in-memory objects. The classifier XML file that contains the data to detect faces.
Converting Image To Grayscale
imageFile = cv2.imread(filePath)
grayscale = cv2.cvtColor(imageFile, cv2.COLOR_BGR2GRAY)
Here, read the image file and convert it to grayscale. Almost all the operations in OpenCV are done in grayscale.
Using classifier to detect a face in image,
Detects the faces in the image
faces = faceCascade.detectMultiScale(
    grayscale,
    scaleFactor=1.1,
    minNeighbors=5,
    minSize=(30, 30)
)
This function will help us to detect the actual face which is the main part of our code, so let’s go over the options:
The detectMultiScale function is used to detects objects of different sizes from the given input image then the detected objects will be returned as the list of the rectangles in the image.
- First will be the grayscale image.
- The second is the scaleFactor. If some faces are closer to the camera appear big compare to another face (Like Selfie). The scale factor compensates for this.
- The detection algorithm makes use of the moving window in order to detect objects.”minNeighbors” defines the count of objects detected near the existing one before it finally confirms that the face found. minSize provides the size of each window.
print("Found {0} faces!".format(len(faces)))
Now, we can able to print the number of faces in the photo,
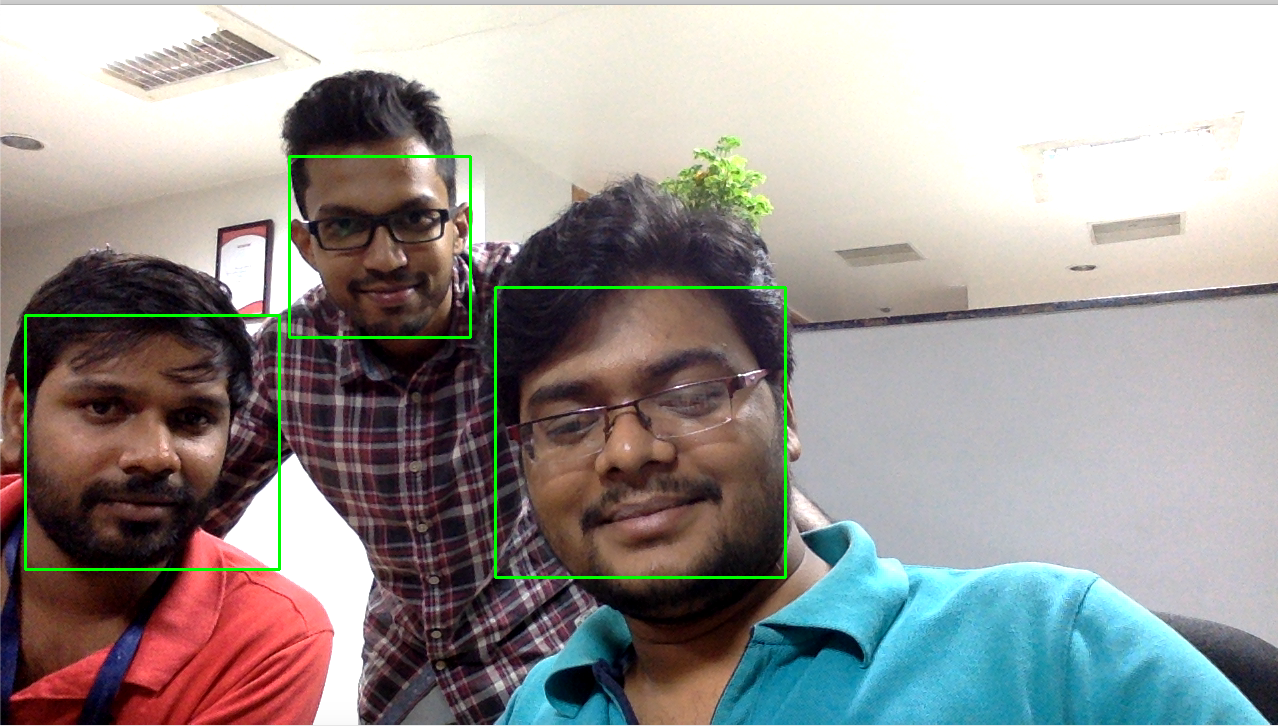
# Draw a rectangle around the faces
for (x, y, w, h) in faces:
    cv2.rectangle(image, (x, y), (x+w, y+h), (0, 255, 0), 2)
Finally, we are going to the loop the face and then draw a rectangle on each face. This function returns four values, they are x,y,w,h.
1) x and y are the coordinates,
2) w and h are the width and height respectively.
cv2.imshow("Faces found", image)
cv2.waitKey(0)
Now, display the image and wait for the user to press any key.
Run this command in Terminal,
python3 face_detect.py ./image.png ./haarcascade_frontalface_default.xml
You can also do it on webcam and for that, you can copy & paste the below code in a new file with the extension of .py and run it
import cv2
import sys
cascPath = sys.argv[1]
faceCascade = cv2.CascadeClassifier(cascPath)
live_video = cv2.VideoCapture(0)
while True:
# Capture frame-by-frame
ret, frame = live_video.read()
grayscale = cv2.cvtColor(frame, cv2.COLOR_BGR2GRAY)
faces = faceCascade.detectMultiScale(
grayscale,
scaleFactor=1.1,
minNeighbors=5,
minSize=(30, 30)
)
# Draw a rectangle around the faces
for (x, y, w, h) in faces:
cv2.rectangle(frame, (x, y), (x+w, y+h), (0, 255, 0), 2)
# Display the resulting frame
cv2.imshow('Video', frame)
if cv2.waitKey(1) & 0xFF == ord('q'):
break
# When everything is done, release the capture
live_video.release()
cv2.destroyAllWindows()
Command used to run for web cam,
Note: Make sure to mention your file name in the command,
python3 face_detect_webcam.py ./haarcascade_frontalface_default.xml
Now, take a look at the outcome.
Hope you guys enjoyed reading it! We would like to come up with interesting topics loved by everyone. Post your thoughts & opinions in comments to serve you better.